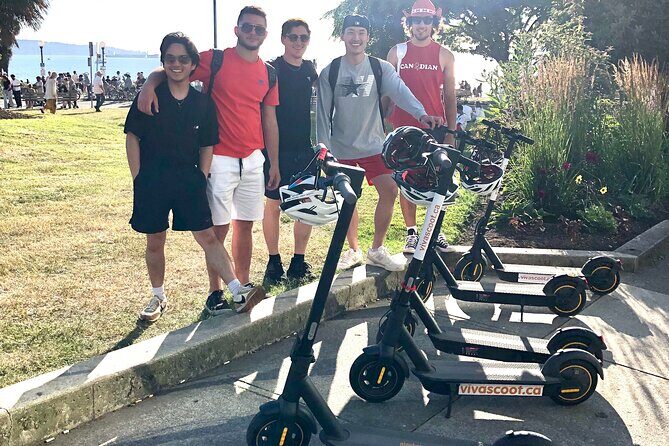
REVIEW · MOTORBIKE & SCOOTER RENTALS
Stanley Park Seawall E-scooter Rental with Self Guided map
Book on Viator →Operated by Viva Scoot Rentals · Bookable on Viator
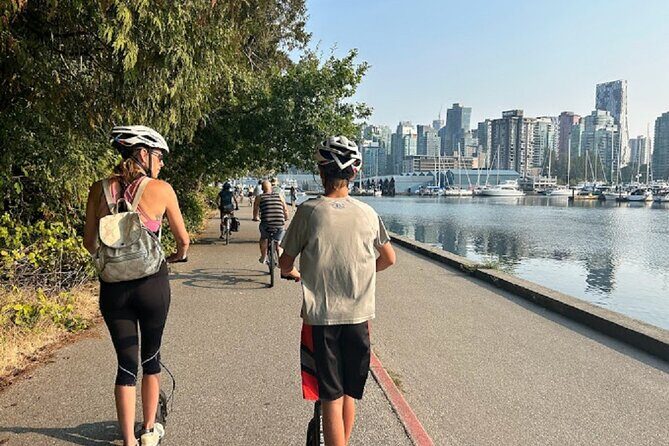
Stanley Park by scooter beats walking. This self-guided ride strings together standout sights around English Bay and the Stanley Park Seawall, with Audiome recordings that tell you what you’re seeing as you go. I like two things a lot: the audio-guided landmarks make the route feel planned without forcing a strict group pace, and the e-scooter format keeps you fresh for viewpoints that would take forever on foot. One drawback to plan for up front: you need moderate physical fitness, and it’s not recommended if you have balance issues.
If you’re trying to cover a lot in a short Vancouver day, this hits a practical sweet spot. The price is $44.90 per person for about 2 to 3 hours, and for that you get a full loop-style experience with multiple photo stops plus quick looks at Lost Lagoon and Coal Harbour. The other thing to know is that the experience relies on good weather, so check the forecast and be ready to adjust if it’s a washout.
In This Review
- Key things to know before you go
- Why This Stanley Park Seawall Scooter Loop Feels Easy
- Price, Time, and Value: What $44.90 Really Buys
- Start at 1886 Pendrell St: Setup That Helps You Get Going Fast
- English Bay Kickoff: Sylvia Hotel and the A-maze-ing Laughter Sculptures
- Quick Photo Breaks: Lost Lagoon Before Stanley Park
- Coal Harbour Views: North Shore Mountains and Burrard Inlet
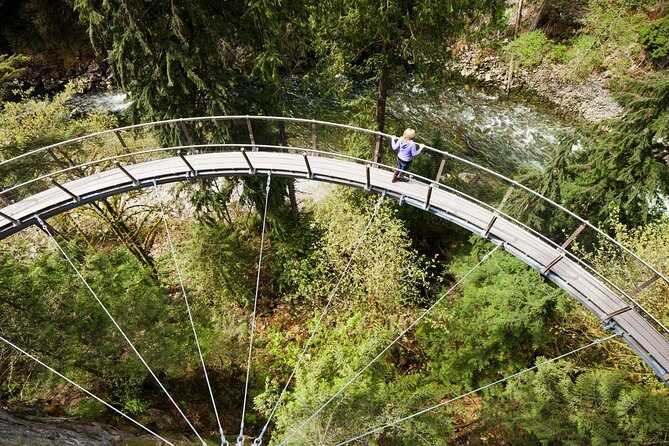
- The Main Event: The 9.8 km Stanley Park Seawall Loop With Audiome Landmarks
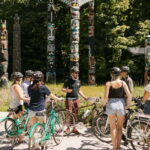
- Brockton Point Totem Poles: Learning the Meaning Behind the Icons
- Brockton Point Lighthouse: Lions Gate Bridge in Your Frame
- Third Beach and the Stretch Home: Lumbermans Arch, Wet Suit Girl, and Lions Gate Bridge
- End Back at English Bay Beach: Wrap It Up With Ocean Air
- Who Should Book This E-Scooter Experience (and Who Should Skip It)
- Should You Book the Stanley Park Seawall E-Scooter Rental With Self-Guided Map?
- FAQ
- How long is the Stanley Park Seawall e-scooter rental?
- What is the price per person?
- Where do I start and where does the tour end?
- Is it self-guided or guided by a person?
- What language is the experience offered in?
- What happens if the weather is bad?
Key things to know before you go
- Self-guided Audiome landmarks: the loop includes stop-by-stop recordings so you’re not guessing what to look for
- A 9.8 km loop: built for covering distance without feeling like a long hike
- English Bay to Stanley Park via Coal Harbour: you get city-and-nature scenery in one flow
- Short timed photo stops: enough time for pictures, but still keeps you moving
- Not for balance problems: e-scooters are fun, but they’re also still riding on two wheels
Why This Stanley Park Seawall Scooter Loop Feels Easy

The big appeal here is simple: you get the look and feel of a classic Stanley Park day, without the slow pace that can drain your energy. The route is laid out so you ride a circuit, stop at key points, and return to where you started in English Bay.
What makes it work for most people is the balance between motion and meaning. You’re not just blasting down a path. Audiome recordings guide your attention to landmarks along the Stanley Park seawall loop, so you’re more likely to pause at the right moments instead of riding past something interesting.
This is also a great “first time in Vancouver” kind of experience. You mix ocean views, a famous park coastline, and a city harbor look—so even if it’s your first visit, the day gives you a solid sense of how Vancouver pieces fit together.
You can also read our reviews of more guided tours in Vancouver

Price, Time, and Value: What $44.90 Really Buys

At $44.90 per person for 2 to 3 hours, the value comes from how much ground and how many stops you cover. You’re not paying for a single viewpoint. You’re paying for a working day plan: scoot transport plus a guided sequence of sights, all self-paced.
Here’s where the cost starts to make sense. Your time is limited, and this experience is structured around that reality. You’ll move between English Bay, the Lost Lagoon area, Coal Harbour, and then the Stanley Park loop with landmark stops. That reduces the extra time you’d spend coordinating public transit, taxis, and separate walks.
Also, the experience is private—your group only. That matters because self-guided experiences can still feel awkward when you’re waiting on others. Here, you should be able to flow at your own pace while still sticking to the route.
Start at 1886 Pendrell St: Setup That Helps You Get Going Fast
The ride starts at 1886 Pendrell St in Vancouver, and it ends back at the same meeting point. That back-to-start structure is more important than it sounds. It keeps the logistics clean—no late-day navigation headache when you’re tired.
Before you set off, you’ll get e-scooter and Audiome instructions. The practical payoff is confidence. In a couple of the high ratings, the same theme pops up: the instructions and safety rundown help you get the map set and feel ready to roll. For a self-guided experience, that support is huge.
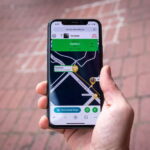
You’ll also use a mobile ticket, with confirmation received at booking time. Have your phone ready and treat it like your key. If your battery is low, plan accordingly before you arrive.
One more note: the experience is offered in English. If you prefer audio guidance over reading signs, you’ll likely find the language match useful.
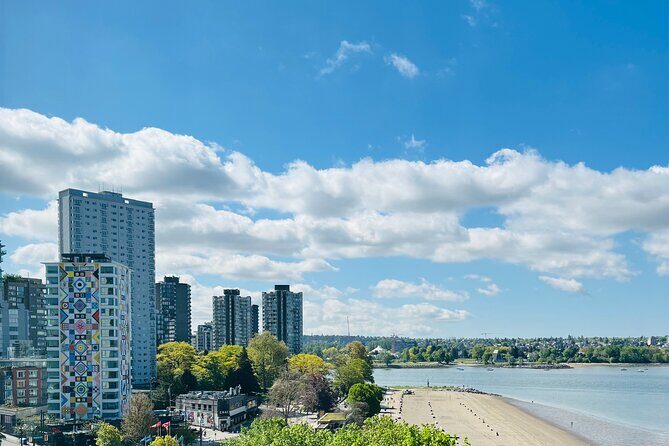
English Bay Kickoff: Sylvia Hotel and the A-maze-ing Laughter Sculptures
You begin at English Bay, starting at the Historic Sylvia Hotel area. This is a smart first stop because the shoreline is right there, and you’re already in the mood for ocean views. The Sylvia Hotel sits across from the waters of English Bay Beach, and it’s also close to the A-maze-ing Laughter Sculptures.
You’ll spend about 15 minutes here. That’s enough time to get bearings, take a few easy photos, and then move on without feeling rushed. If you like playful public art, this first stretch delivers. The laughter sculptures are larger than life, with funny gestures and expressions that make for quick, memorable shots.
Even if you’re not a “public art” person, it’s a low-effort way to start the day because you don’t need to read anything complicated. You just look, snap, and go.
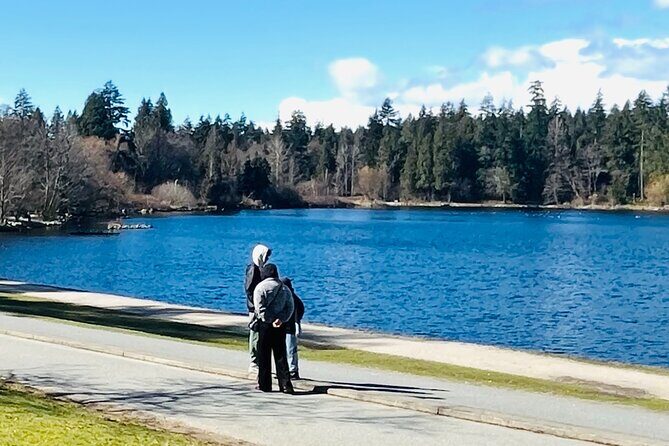
Quick Photo Breaks: Lost Lagoon Before Stanley Park
On the route toward Stanley Park and Coal Harbour, you pass Lost Lagoon—an artificial, captive 16.6-hectare body of water. It’s one of those places that feels different from the open shoreline. You’re still near the coast, but it has a quieter, enclosed feel.
You’ll get around 15 minutes here, and the draw is wildlife. Lost Lagoon is home to the Jubilee Fountain and many types of birds, and you might also spot turtles and other wild life.
A realistic way to think about this stop: treat it as a “look-and-spot” window rather than a guarantee. Wildlife viewing is always a toss-up, but the setting itself is calm and worth a short break between longer riding stretches.
You can also read our reviews of more tours and experiences in Vancouver


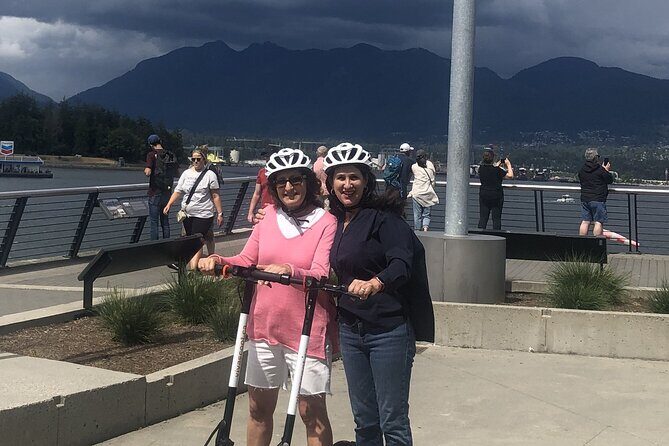
Coal Harbour Views: North Shore Mountains and Burrard Inlet
Next comes Coal Harbour, where the vibe shifts from park-adjacent quiet to big-city harbor views. You’ll get about 30 minutes, which is a generous chunk for one viewpoint zone.
This is where you start stacking scenery layers: the North Shore mountains in the distance, plus Burrard Inlet. For me, this stop works because it frames Stanley Park as more than just trees and seawall. You get the city backdrop, and it helps your brain understand where you are.
If the day is clear, this is also one of the spots where photos tend to look extra crisp, because you’re capturing wide angles of water and mountains.
The Main Event: The 9.8 km Stanley Park Seawall Loop With Audiome Landmarks
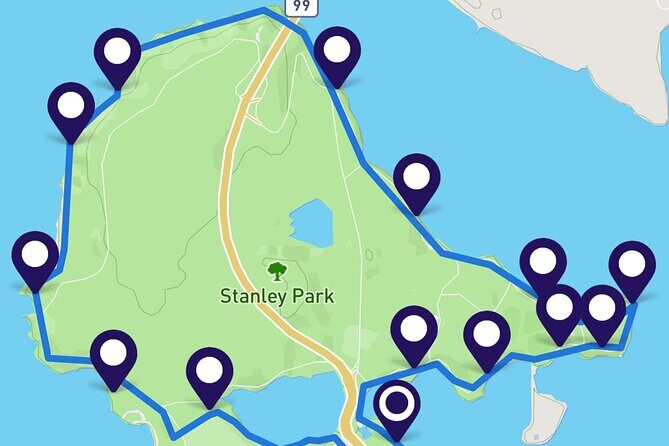
After you’ve done the pre-park sights, you start the Stanley Park loop with all landmarks included on the Audiome recordings. The loop is about 9.8 km, and your overall ride time is typically 2 to 3 hours depending on how long you pause for photos.
The key thing is how the audio changes the experience. Without it, a seawall ride can feel like “I’m riding and looking.” With it, you get a stop-by-stop rhythm. You know when to pay attention, and you learn why certain points matter instead of just absorbing random views.
You’ll scoot along the seawall, taking in the ocean-side scenery and stopping at the landmarks the audio covers. That structure makes it easier to handle the flow of the park—especially if you haven’t done Stanley Park before.
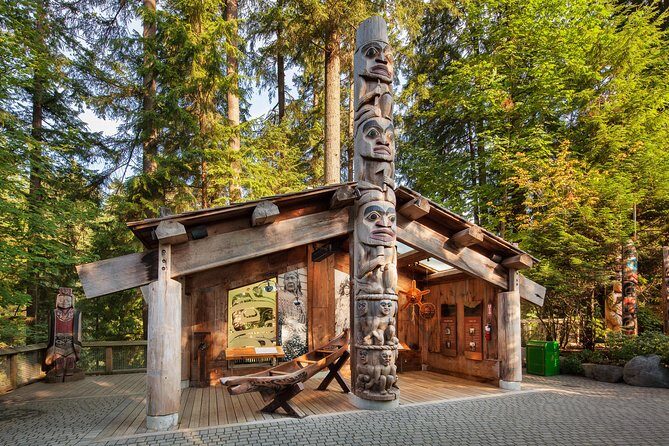
Brockton Point Totem Poles: Learning the Meaning Behind the Icons
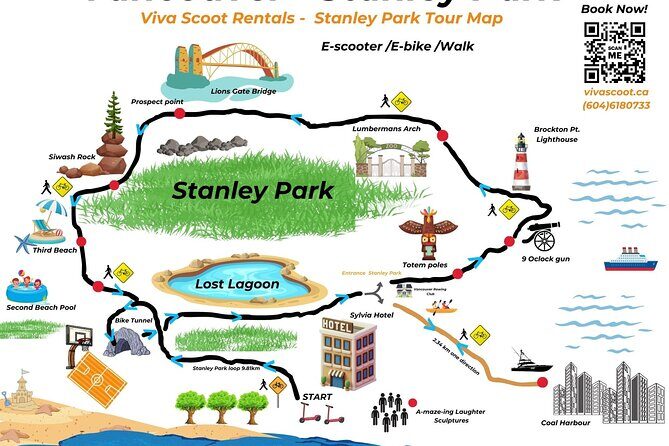
One of the best-known points along the loop is Brockton Point Totem Poles, and you’ll have about 20 minutes there. This is a meaningful pause because it’s not only a photo stop. The experience includes Audiome guidance so you can learn the meaning behind the totem poles.
You’re also in a prime viewpoint location. The area gives you a strong sense of place—park, coastline, and a historic landmark all in one. If you’re the kind of person who likes to understand what you’re seeing (without reading a wall of text), this stop is a payoff.
One practical tip: use the extra minutes here to take both a wide shot and a close-up. The poles look great in context, and close details make for stronger souvenirs.
Brockton Point Lighthouse: Lions Gate Bridge in Your Frame
From the totem poles, you continue to Brockton Point Lighthouse, with about 10 minutes allocated. The time is short, but that’s often the sweet spot for a viewpoint.
You’re going for the big lines in the scenery: Lions Gate Bridge and the North Shore mountains. Even if you only pause briefly, the payoff is strong because the framing is natural. This is one of those locations where the view does most of the work.
If it’s windy, keep your plans simple. Take your photos, listen to the audio segment, then keep moving so you don’t fight the elements.
Third Beach and the Stretch Home: Lumbermans Arch, Wet Suit Girl, and Lions Gate Bridge
As you head toward the end of the loop, you’ll pass several notable points around the third beach area. You’ll have about 20 minutes, covering Lumbermans Arch, the Girl in wet suit statue, Lions Gate Bridge, plus Third Beach and Second Beach.
This stop cluster is great for variety. You get the fun, recognizable statue moments, plus the natural beach scene, plus the bridge view again—different angle, different feel.
It’s also a good time to slow down a touch. By then, you’ve already done your major landmark stops, so this feels more like enjoying the park than rushing through it. Still, you don’t want to overstay, because the route still ends back in English Bay.
End Back at English Bay Beach: Wrap It Up With Ocean Air
You finish back at English Bay Beach after completing the 9.8 km loop, with about 10 minutes at the end. This is a nice way to close the day because you return to the area you started—without needing to “find your way out.”
Use this last window to relax and take in the bay views and beaches. If you’ve been focused on landmarks the whole time, this final stop is your reset. It’s also a good time to grab any photos you didn’t manage at the beginning.
And yes, you’ll likely feel pleased you didn’t end your day with one more long walk. Ending near water is a good Vancouver habit.
Who Should Book This E-Scooter Experience (and Who Should Skip It)
This ride is best if you want a structured self-guided day that still feels flexible. You get moderate-length riding, multiple photo stops, and audio guidance that explains what you’re looking at along the seawall.
You’ll probably enjoy it if:
- you like scenic routes but don’t want a full-day hiking plan
- you want a mix of ocean, park coastline, and harbor views
- you’re comfortable handling a scooter safely and steadily
You should consider skipping or choosing something else if:
- you have balance problems (the experience is not recommended for that)
- you’re not comfortable with a moderate physical effort level
- weather is questionable, since the experience requires good weather
It’s private, so it can work well for couples and small groups who want to move together without getting pulled along by a large crowd.
Should You Book the Stanley Park Seawall E-Scooter Rental With Self-Guided Map?
I’d book it if you’re aiming for maximum sights in a limited time window and you like the idea of audio-led landmarks. The value is strong because the $44.90 gets you a full route flow—English Bay, Lost Lagoon, Coal Harbour, then the 9.8 km Stanley Park seawall loop with multiple named stops. The audio guidance is a big part of why this kind of self-guided ride works instead of feeling like random wandering.
Skip it if you’re worried about balance, or if you hate riding on two wheels for any reason. Also be honest about weather. When the day is calm and clear, the viewpoints land better.
If you want a practical, scenic Vancouver highlight day that doesn’t require big planning once you arrive, this is one of the easier ways to pull it off.
FAQ
How long is the Stanley Park Seawall e-scooter rental?
Plan for about 2 to 3 hours.
What is the price per person?
The price is $44.90 per person.
Where do I start and where does the tour end?
You start at 1886 Pendrell St, Vancouver, BC V6G, and the experience ends back at the same meeting point.
Is it self-guided or guided by a person?
It’s self-guided, using a self-guided map and Audiome recordings, with e-scooter and audio use instructions at the start.
What language is the experience offered in?
The experience is offered in English.
What happens if the weather is bad?
The experience requires good weather. If it’s canceled due to poor weather, you’ll be offered a different date or a full refund.