REVIEW · CYCLING TOURS
Stanley Park Self Guided Bike Tour
Book on GetYourGuide →Operated by Moves Media · Bookable on GetYourGuide
Two wheels, one iconic park, zero stress. This self-guided Stanley Park bike ride uses AudioMe Tours GPS-based audio to cue you at the right moments along the 9km loop, with narration for major landmarks and wildlife you pass. I especially liked the GPS-triggered delivery and the fact that the commentary is available in multiple languages (English and Spanish work in real groups).
My main caution is practical: the experience relies on your phone. One smooth ride depends on keeping your device accessible (a phone left locked can interfere with the GPS-following), and the bike rental is separate from the tour, with rental prices reported up to about 40 CAD.
In This Review
- Quick hits on this Stanley Park GPS bike ride
- Starting at Spokes Bike Rental on West Georgia
- How the AudioMe Tours GPS audio works (and what you bring)
- The 9km loop: easy riding with a few small hills
- Stanley Park Sea Wall: skyline views with built-in narration
- Totem Poles and Brockton Point: pause where the park gets memorable
- Lions Gate Bridge: a viewpoint moment you can plan around
- Vancouver Aquarium and the attraction reset
- Second Beach, Lost Lagoon, and Third Beach: choose your beach mood
- Price and value: $6 for audio, not for the bike
- Tips to avoid hiccups before you pedal
- Who should book this Stanley Park bike audio tour
- Should you book this Stanley Park Self Guided Bike Tour?
- FAQ
- How long is the Stanley Park self-guided bike tour?
- Where does the tour start?
- Is the bike rental included in the price?
- Do I need headphones for the audio?
- Is the ride difficult?
- What landmarks are included on the route?
- Is the tour wheelchair accessible?
- Can I cancel for a refund?
Quick hits on this Stanley Park GPS bike ride
- GPS-triggered audio that plays when you reach the landmarks, so you’re not constantly checking your phone
- A 9km loop in about 2 hours at an easy pace, with only a few small hills
- Major stops on the route including Stanley Park Sea Wall, Totem Poles, Brockton Point, Lions Gate Bridge, and beaches
- Multilingual commentary (English and Spanish noted), which is a real win for mixed groups
- You bring your own headphones/earbuds, and charging your phone is part of the plan
- Bike rental is not included; you’ll rent at Spokes Bike Rental before you ride
Starting at Spokes Bike Rental on West Georgia

You’ll begin at Spokes Bike Rental at 1798 W Georgia St, Vancouver. The tour ticket covers the GPS audio access, not the bicycle itself, so you’ll want to handle the bike first and then match your ride time to the 2-hour experience window.
This also helps you avoid the “where do we go now?” feeling. Once you’re rolling, the app does the heavy lifting by guiding you through the park’s route and highlighting the big areas you came for.
You can also read our reviews of more cycling tours in Vancouver


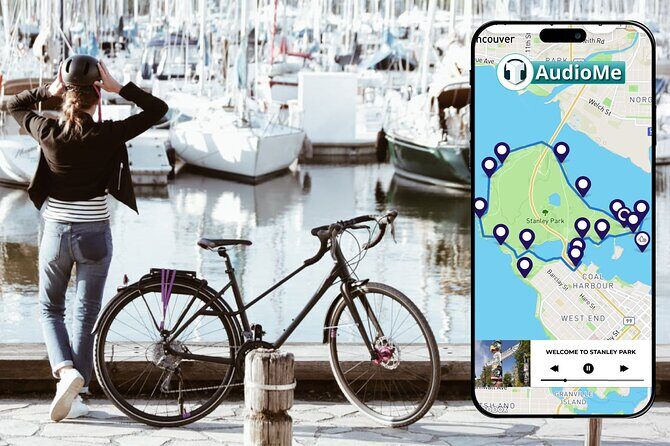
How the AudioMe Tours GPS audio works (and what you bring)
AudioMe Tours is the platform behind the self-guided experience, and it’s built around a phone app for iOS or Android. You download the app, then use the GPS map to see where you are and follow the route around Stanley Park.
Two things matter for a smooth ride. First, you’ll need headphones or wireless earbuds (or a speaker) to clearly hear the commentary on the move, because headphones are not included. Second, keep your phone charged and accessible—one review called out that the GPS commentary didn’t keep up unless the phone was unlocked, so plan to keep it in an easy-to-check state while you ride.
What I recommend you pack is very simple and very “Stanley Park”:
- Charge your phone
- Wireless earbuds or speaker for clear listening
- Water bottle
- Sunscreen, plus hat or sunglasses
- Snack or lunch (or plan to buy along the route)
- Camera
- Bathing suit if you want the option of a beach stop
The 9km loop: easy riding with a few small hills

Difficulty is listed as easy, suitable for all levels of riding, with a few small hills. In practice, that means you don’t need to be a fitness athlete, but you also shouldn’t dress like you’re going to a beach picnic and then expect the route to be totally flat.
The tour is designed around a 9km loop, and the duration is 2 hours. That timing is useful because it keeps expectations realistic: you’ll have time for stops at key landmarks and beaches, but it’s still a “ride with pauses” plan, not an all-day wander.
If you like structure without strict timing, this is the sweet spot. You get guidance from GPS audio, yet you control how long you linger at places like the aquarium area or the beaches.
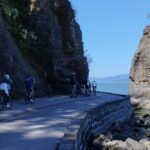
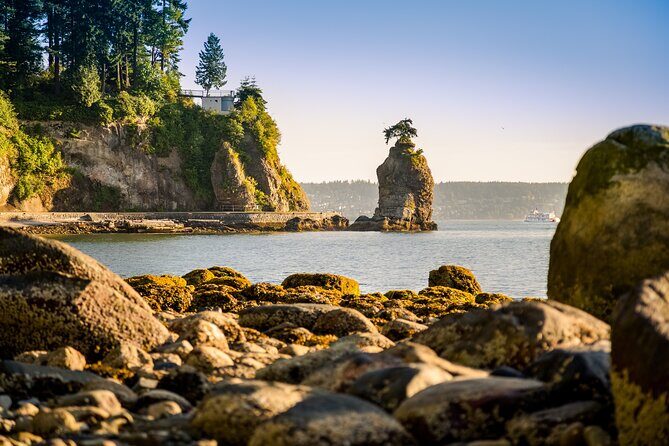
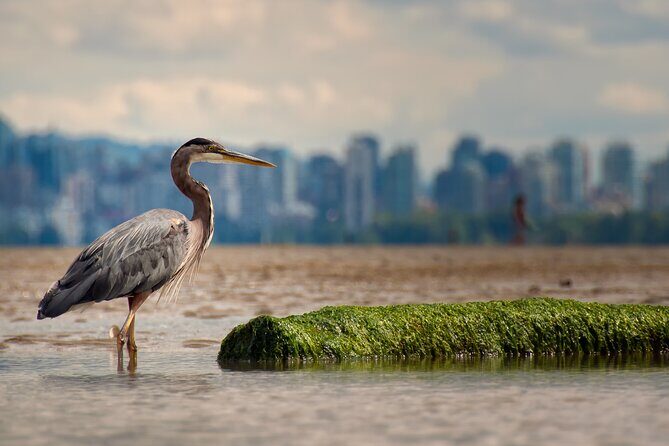
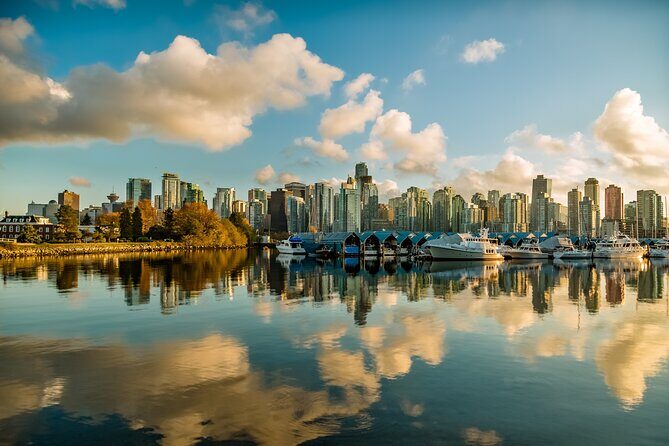
Stanley Park Sea Wall: skyline views with built-in narration

The Sea Wall is one of the headline experiences, and it’s a great first “big wow” moment. You’ll be riding with views that include downtown Vancouver, then you’ll hear the audio commentary as you approach the landmark areas.
The value here is less about checking signs and more about staying present while you ride. On a loop this size, constant stopping to read info can slow you down. GPS-triggered narration helps you absorb the story and context as you roll, so your photos and pauses feel more purposeful.
A practical tip: if you want photos, pick your moment before you need it. Sea Wall viewpoints are best when you’re not rushing, and your phone is busy doing audio and GPS—so treat it like a moment you plan, not a distraction.
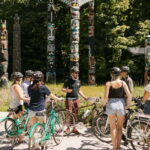
Totem Poles and Brockton Point: pause where the park gets memorable
Totem Poles and Brockton Point are included highlights, which is smart because they’re classic Stanley Park markers that many people want to see quickly and confidently. The app’s commentary helps connect what you’re looking at to the context around it.
I also like that the narration includes stories and fun facts tied to what you’re passing. One review specifically praised the way the audio felt engaging, with history, stories, and fun facts about landmarks and wildlife. That matters because it turns the ride from scenery-only into something more satisfying for first-timers.
At these stops, you’ll likely want a short break off the pedals—just enough to take photos and reset your pace. This is one of those areas where a quick stop makes the rest of the loop feel easier.
You can also read our reviews of more guided tours in Vancouver


Lions Gate Bridge: a viewpoint moment you can plan around

Lions Gate Bridge is another named highlight, and it makes sense as a mid-to-late ride payoff. As you approach that area, you’ll get narration tied to the bridge viewpoint while you’re still moving at an easy pace.
The “why it’s worth it” angle here is simple: the bridge view gives your eyes a different kind of payoff than the park-only scenery. It also helps you keep your route feeling cohesive, since the audio is cueing you as you progress rather than leaving you guessing where you are.
If you’re riding with someone who gets antsy without a plan, this stop usually gives you that shared “Okay, now we’re getting there” feeling.
Vancouver Aquarium and the attraction reset

The Vancouver Aquarium is listed as a major attraction on the route. The tour’s focus is self-guided audio and route navigation, so your time here is about using the pause points wisely, not about rushing to one specific entrance.
This is where I like to think of the audio tour as a pacing tool. You can treat the aquarium area like a reset: stretch your legs, take photos, and decide if you want to spend more time around that part of Stanley Park before continuing.
Because the tour lasts about 2 hours, you’ll want to be honest about how much time you give every stop. If you spend too long on one attraction, you’ll feel it in the final beach section.
Second Beach, Lost Lagoon, and Third Beach: choose your beach mood
Beaches are a big part of why people bike this loop, and the route includes Second Beach and Third Beach, plus Lost Lagoon. Even if you don’t go all the way to a swim, these named areas give you clear options for where to pause and cool down.
The packing info even calls out bathing suit for a dip at one of the beaches along the route, which tells you the tour is built for real breaks—not just look-from-a-distance sightseeing.
Here’s how I’d think about it for your day:
- If you want a quick photo and a breeze, pick the beach that feels easiest to reach at your pace.
- If you want more time outside the bike saddle, use the aquarium and bridge sections to set up a longer beach pause later.
Third Beach is specifically listed as a highlight, so plan it as your likely “finish strong” moment. It’s a natural place to slow down, enjoy the view, and wrap your ride with something more relaxed than landmark spotting.
Price and value: $6 for audio, not for the bike

At $6 per person, this tour is priced as an audio-guidance experience, not as a full package deal that includes equipment. That can be a smart value move if you already know you’ll rent a bike anyway.
But don’t ignore the extra costs that come with the setup:
- Bike rental is not included, and prices have been reported up to about 40 CAD at the shop near the start.
- Headphones are not included, so you’ll need your own earbuds or a speaker setup.
So is it worth it? If you want a self-guided ride where the story comes to you through GPS audio, the low price for the tour itself adds up fast. You’re paying for route guidance and commentary, not for someone to physically lead the group.
It’s also a solid choice when you want flexibility. A self-guided loop means you can adjust for weather, energy, and how long you linger at places like the Sea Wall, Totem Poles, and beaches.
Tips to avoid hiccups before you pedal
The reviews and details point to a few real-world factors that can make or break the experience. None are complicated, but they’re worth treating seriously.
First, use your phone like it’s part of the ride. If GPS-triggered audio doesn’t react the way you expect, it may be because the screen is locked. Keep the phone accessible so the tour can follow along.
Second, bring proper audio gear. Headphones are not included, and the commentary is the main “tour guide” here. Wireless earbuds or a small speaker will help you hear the narration even with park noise.
Third, think about energy and sun. The tour is easy, but you’ll still be outside for about 2 hours. Sunscreen, water, and a snack (or spending time buying food along the route) are the practical trio that keeps the day fun instead of annoying.
Finally, charge your phone before you go. The app experience depends on it, and your “can I keep riding?” stress level drops a lot when you start at 100 percent.
Who should book this Stanley Park bike audio tour
This one fits best when you want:
- An easy 9km loop with audio guidance rather than a strict group pace
- Time at major landmarks like Sea Wall, Totem Poles, Brockton Point, Lions Gate Bridge, and beaches
- A more independent sightseeing style that still feels informative
It also helps if your group includes different language preferences. Multiple languages are part of the appeal, including English and Spanish noted in a real booking.
I’d skip it if you hate using apps while moving, or if you rely on a phone that constantly locks screens and you can’t adjust settings. The audio tour is smart, but it’s still built on your device working normally.
And if you don’t want to rent equipment, remember: the bicycle is separate. You’ll still be able to do the plan, but you’ll need to sort out your wheels first.
Should you book this Stanley Park Self Guided Bike Tour?
Book it if you want an easy, structured ride around Stanley Park where the commentary comes right when you’re at the landmarks. The GPS-triggered audio and multilingual option are the standout strengths, and the $6 price makes the “audio guidance” part a low-risk add-on.
Pass or reconsider if you’re not comfortable relying on a phone during the ride, or if you want a fully packaged bike-and-guide experience without extra steps. Also budget for bike rental since it’s not included, with prices reported up to around 40 CAD at the start shop.
If you plan ahead—charge your phone, bring earbuds, and give yourself about 2 hours—this is an efficient, satisfying way to experience Stanley Park beyond just looking at a map.
FAQ
How long is the Stanley Park self-guided bike tour?
The tour duration is listed as 2 hours.
Where does the tour start?
The starting point is Spokes Bike Rental, 1798 W Georgia St, Vancouver.
Is the bike rental included in the price?
No. Bike or scooter rental is not included in the ticket, and you need to rent separately at Spokes.
Do I need headphones for the audio?
Yes. Headphones are needed to connect your phone.
Is the ride difficult?
It’s rated easy and suitable for all riding levels, with a few small hills.
What landmarks are included on the route?
Key highlights include Stanley Park Sea Wall, Totem Poles, Brockton Point, Lions Gate Bridge, Vancouver Aquarium, Second Beach, Lost Lagoon, and Third Beach.
Is the tour wheelchair accessible?
The tour is listed as wheelchair accessible.
Can I cancel for a refund?
Yes. Free cancellation is available up to 24 hours in advance for a full refund.