REVIEW · SEA TO SKY GONDOLA TOURS
Snowshoeing at The Top of The Sea to Sky Gondola
Book on Viator →Operated by Breakaway Adventures · Bookable on Viator
Snowshoeing at the top of the Sea to Sky Gondola is a clean break from city time. You’ll ride up Howe Sound from Vancouver, glide in the Sea to Sky Gondola, cross the Sky Pilot suspension bridge, then work your way through snowshoe trails around the Summit Lodge area with a real guide at your side.
I like that you get built-in sightseeing without needing to plan anything yourself: the Sea to Sky Highway stop and gondola ride do most of the heavy lifting. I also love the small guide touches that make winter gear days go smoother, like Adrian bringing extra gloves and even sharing homemade chocolate chip cookies. One watch-out: this is for people with a strong physical fitness level, so if you’re not comfortable with winter walking and steady effort, you’ll want to take that seriously.
In This Review
- Key highlights before you go
- Getting up Howe Sound from Vancouver (without the stress)
- Sea to Sky Gondola to Summit Lodge: views that set the tone
- The Sky Pilot suspension bridge moment
- Snowshoeing at the summit: what conditions can feel like
- Gear support and why the guide matters
- Where the value really comes from (price vs. what you get)
- What the schedule feels like on the ground
- Who this tour fits best (and who might want a different plan)
- Practical tips to enjoy your snowshoe day more
- Book it or skip it? My take
- FAQ
- Where are the pickup and drop-off locations?
- What time does the tour start?
- How long is the experience?
- How much does it cost?
- What’s included in the price?
- Is lunch included?
- How many people are in the group?
- What fitness level do I need?
- Is the tour offered in English, and do I get a ticket?
- What is the cancellation policy?
Key highlights before you go
- Door-to-door Vancouver pickup: easier than figuring out trains, buses, and timing.
- Sea to Sky Highway stop: scenic roadside time without driving yourself.
- Summit Lodge views plus snowshoe trails: sightseeing and activity in one loop.
- Sky Pilot suspension bridge: a quick thrill stop with big views.
- Small group size (max 8): more personal attention on the snow.
- Guide support you can feel: Adrian’s extras like extra gloves and photo help show up in practice.
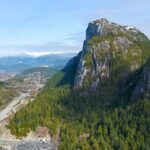
Getting up Howe Sound from Vancouver (without the stress)
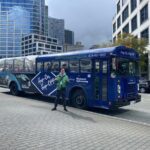
This day starts with pickup right where you’re staying in Vancouver. That matters more than people think. Winter schedules get messy fast, especially when you’re trying to self-drive in the dark or line up your own parking and shuttle. With door-to-door transportation, you can just show up, get settled, and focus on the day.
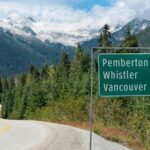
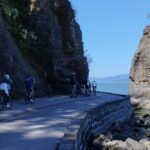
You’ll head north toward Squamish along the Sea to Sky corridor. The route itself is part of the value here. Instead of only getting the summit views, you also get a Sea to Sky Highway stop along the way. It’s a chance to stretch your legs and look out over the coastline and mountains before you switch from road views to snow.
The trip runs about 6 hours total, and the start time is 9:00 am. Plan your morning like you’re going to a half-day adventure, not a casual stroll. You’ll be ready when you arrive, and you’ll still have daylight energy for the snowshoe portion.
You can also read our reviews of more tours and experiences in Vancouver.
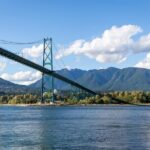

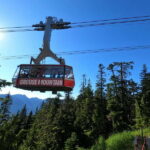
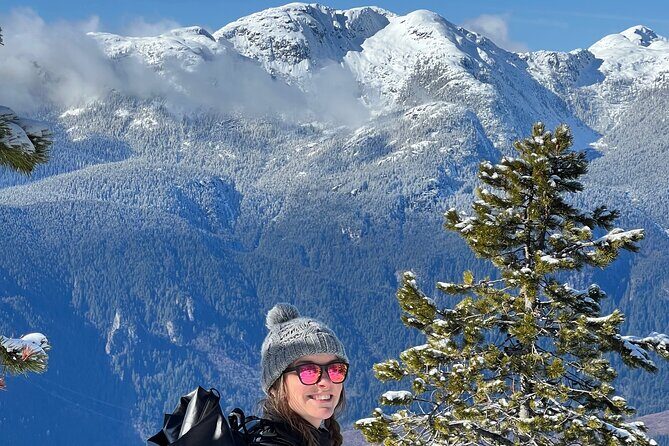
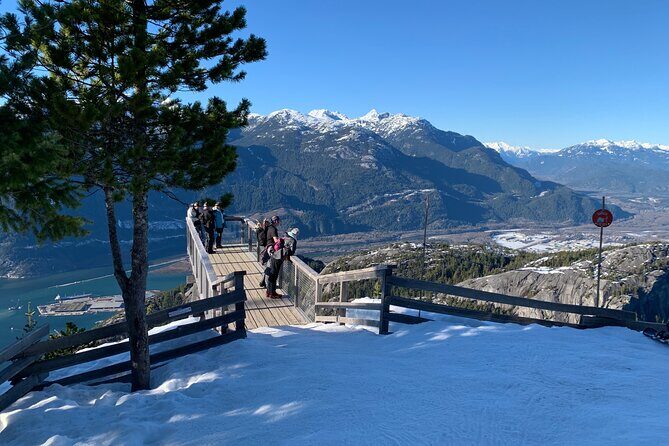
Sea to Sky Gondola to Summit Lodge: views that set the tone
The gondola is where the day shifts gears. You move from road scenery into high-elevation winter scenery quickly, with a ride that keeps you out of the cold while you climb. Then you arrive at the Summit Lodge area, where the views open up over Howe Sound, the coastal forest, and the surrounding mountains.
This part is more than sightseeing wallpaper. It helps you understand what you’ll be walking through. From the summit, you can see how snow has settled, where it looks packed down, and what kind of trail conditions you might face. That’s useful when you’re about to start snowshoeing, because the right expectations make the walking feel more confident.
You’ll also get a built-in reason to slow down for photos. One of the standout details from the experience is how seriously the guide takes capturing moments. Adrian is known for offering photos and short video clips during the day, which is great if you don’t want to spend the whole trip fiddling with your phone.
The Sky Pilot suspension bridge moment
At the summit, you’ll cross the Sky Pilot suspension bridge as part of your route. This is a quick stop, but it’s a memorable one because it adds variety to a snowshoe day.
Bridges can make people tense, so take it at face value: you’re walking above a big drop in an area where winter air can feel crisp. The payoff is your timing. You get the bridge after the gondola climb, when you’ve already earned the views, and before you settle into the snow trails. It’s a nice pacing tool for a day that mixes active effort with big sights.
If you’re the type who likes a clear “checkpoint” moment—something tangible you can point to—this bridge is that. It also helps break up the day so the snowshoe portion feels like its own activity, not just a long walk from one view platform to another.
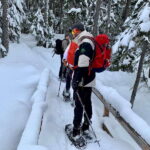
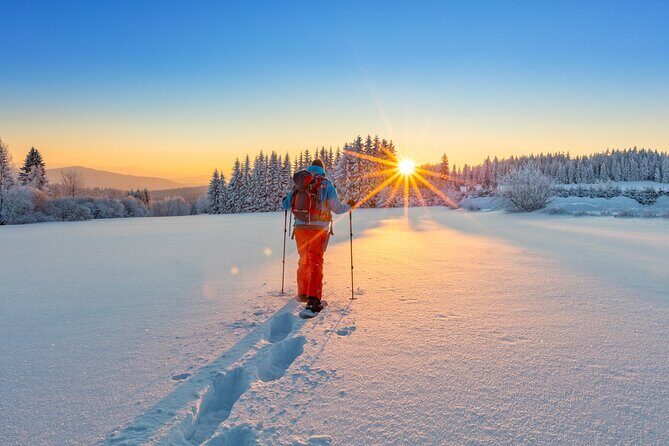
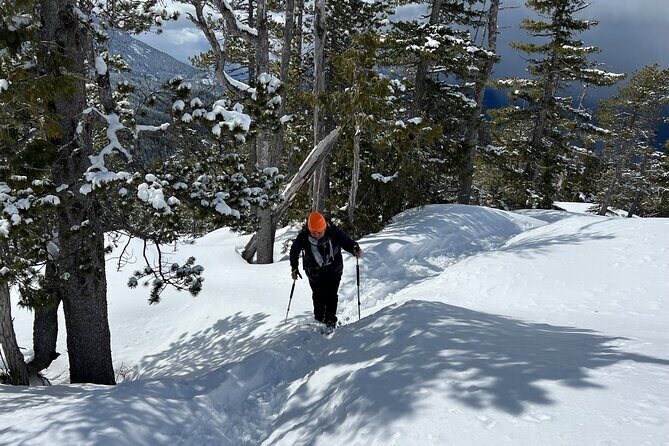
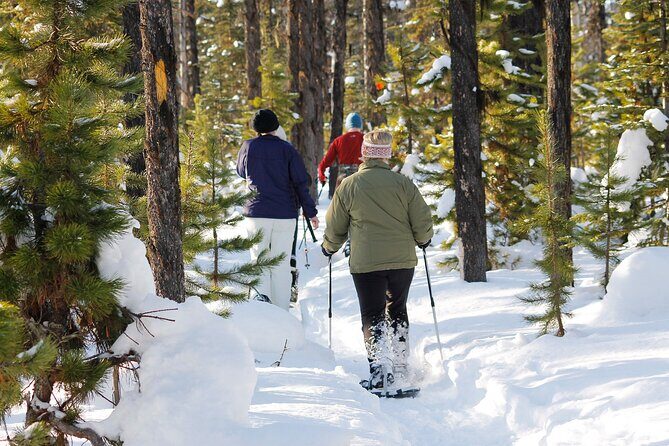
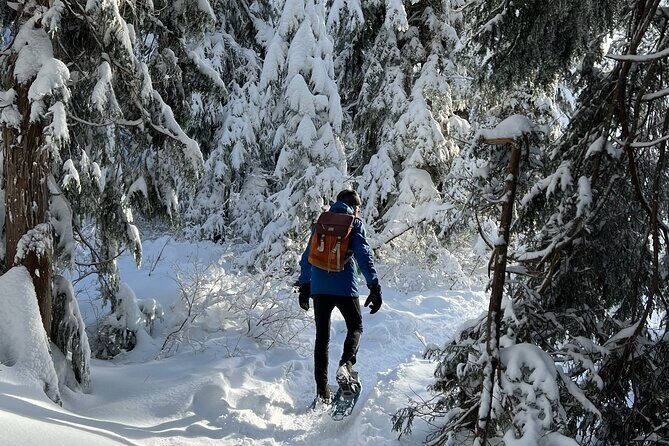
Snowshoeing at the summit: what conditions can feel like
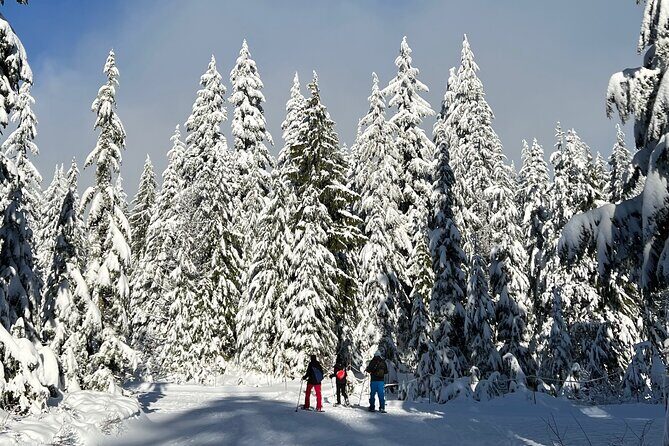
This is the main event: snowshoeing trails from the summit area. The terrain is set up for winter visitors, and snowshoe gear is provided—so you’re not stuck trying to guess what to rent or whether you picked the right size.
One thing I take seriously when I read about gear days is how traction works when snow isn’t perfect. In one account, a guest talked about getting crampons and felt like a superhero in the snow. That lines up with what you should expect in real winter conditions: snow can be patchy, icy, or uneven depending on recent weather and foot traffic. So if you’re thinking about comfort and safety, pay attention to what your guide suggests for your footing.
Snowshoeing is also one of the better “active sightseeing” options because you don’t need to be an athlete to appreciate the outdoors—you need steady effort and good winter awareness. The tour notes that you should have a strong physical fitness level, which tells you this isn’t meant to be a slow, flat promenade. It’s a workout disguised as scenery.
A practical approach: dress in layers, expect cold hands at first, and keep your pace controlled early. You’ll warm up as you move, but winter gear takes time to adjust.
Gear support and why the guide matters
Snowshoeing days often succeed or fail based on the guide, not the weather. Here, the guide support shows up in multiple ways.
Adrian is highlighted for being friendly and knowledgeable, but the real win is preparation. In one day, he brought extra gloves when a guest forgot theirs. That’s the kind of detail that prevents a small problem from becoming an uncomfortable hour. He also shared homemade chocolate chip cookies, which might sound like a small thing—until you’re cold, you’ve walked a bit, and someone offers a warm, sweet moment in the middle of winter.
He’s also involved in the photo side of things. If you want couple shots or clean action photos without stopping every ten seconds to wrestle your camera, that help matters.
The day includes snowshoe equipment and gondola fees, which means you’re not juggling multiple vendors. Your job is to show up ready and dressed right. The guide handles the parts that are hard to DIY: getting you to the summit, setting up gear, and guiding you through the trails.


Where the value really comes from (price vs. what you get)
At $138.20 per person, this isn’t a “budget” activity. But it can be a solid value if you compare it to the total cost of doing the same day alone.
You’re paying for:
- Private transportation with door-to-door pickup and drop-off anywhere in Vancouver
- Gondola fees
- Snowshoeing equipment
- A guided day that includes the summit route and trail time
If you tried to assemble this yourself, you’d likely spend money on transit and parking, then pay separate rates for gondola access and gear rentals. Plus, you’d still need to navigate winter logistics: timing, what to wear, and how to choose the right trail pace.
The tour duration—about 6 hours—is also part of the value. You get a full outing without turning it into an all-day endurance event. It’s enough time to experience the views and still move through the snow trails with energy to enjoy photos and bridge time.
The one cost you should plan for is lunch, since it isn’t included. That’s common on outdoor day trips, but it affects your budgeting. If you want to avoid spending time searching for food on the go, you may want to eat before you start or bring a strategy for where you’ll grab lunch during the day.
What the schedule feels like on the ground

The day starts at 9:00 am, and the flow is simple: you’re picked up, driven up the Sea to Sky corridor, then taken through gondola and summit stops before snowshoeing.
A key practical point: start times like this feel early when you’re on vacation. But the upside is better light and a calmer mood on the mountain. Also, you’re less likely to feel rushed, because the activity is built as a guided loop rather than a series of separate bookings.
You should expect it to be active. Even if snowshoe walking isn’t “running,” it works your legs and changes how you balance. Dress for movement and bring the mindset that winter effort is normal here.
Who this tour fits best (and who might want a different plan)
This trip is best for you if you want a guided winter experience with a famous scenic corridor and you don’t want to handle logistics. It also helps if you like a mix of views and action—road scenery on the way up, gondola summit views, then snowshoe trails.
The group size is capped at 8 travelers, so it tends to feel personal rather than crowded. That’s helpful when you need fit adjustments, quick safety reminders, or guidance on snow conditions.
It’s less ideal if you’re unsure about physical effort. The requirement is a strong fitness level, and snowshoe walking does ask for stamina. Also, if you’re expecting lunch to be provided and you don’t plan ahead, you’ll need to adjust.
If you want a calm winter intro, a different gentler option might suit you better. But if you want real movement plus big scenery, this one makes sense.
Practical tips to enjoy your snowshoe day more
A few things that will help you have a smoother experience:
- Dress in layers so you can manage warmth after the gondola climb and during snowshoe walking.
- Bring gloves you’re confident in. If you forget, it’s good to know guides may have extras (as Adrian did for a guest), but don’t count on it.
- Wear footwear that won’t slip once you’re in snowy conditions. Snowshoe setups help, but winter footing still matters.
- Keep your phone protected. You’ll want photos from the bridge and summit, and cold weather drains batteries faster than you expect.
- Plan for lunch since it’s not included. You’ll enjoy the day more if you’re not hungry and distracted.
Book it or skip it? My take
I’d book this tour if you want an efficient Vancouver-to-snowshoe adventure with private transportation, summit views, and a guide who takes the “small details” seriously—extra gloves, helpful photo time, and even homemade treats from Adrian.
Skip it if you don’t meet the fitness expectation and want something more casual. Snowshoeing here isn’t presented as a relaxed walk. It’s outdoors time with real effort.
If you’re aiming to experience the Sea to Sky area in winter without DIY stress, this is a strong choice, especially with the small group size and included gondola and gear.
FAQ
Where are the pickup and drop-off locations?
Pickup and drop-off are door to door anywhere in Vancouver.
What time does the tour start?
The start time is 9:00 am.
How long is the experience?
The duration is about 6 hours.
How much does it cost?
It costs $138.20 per person.
What’s included in the price?
The price includes private transportation, snowshoeing equipment, and gondola fees.
Is lunch included?
No, lunch is not included.
How many people are in the group?
The maximum group size is 8 travelers.
What fitness level do I need?
You should have a strong physical fitness level.
Is the tour offered in English, and do I get a ticket?
The tour is offered in English, and you’ll receive a mobile ticket. Confirmation is received at booking time.
What is the cancellation policy?
You can cancel for a full refund up to 24 hours before the experience starts. If you cancel less than 24 hours before the start time, the amount paid is not refunded.