REVIEW · PHOTOGRAPHY SESSIONS
Photography & Walk in Stanley Park
Book on Viator →Operated by Nature PhotoHikes · Bookable on Viator
Stanley Park looks good on camera. Two hours of walking from Brockton Point through old-growth forest to the Seawall and then catching sunset at English Bay makes the timing feel effortless, and you get real coaching on smartphone tips. I like the one-on-one attention and the fact that you receive complimentary photos right after your walk. The only catch: this tour needs good weather and you should be ready for steady walking.
This is a small-group photo hike run by Nature PhotoHikes, capped at 7 people, with English-speaking guidance that can be adjusted to your physical ability—more time in the forest if you’re up for it, or just the main sights if you want an easier route. You’ll start at 3:00 pm near Burrard Street, travel as needed (transportation is included), and finish back where you started.
In This Review
- Quick hits before you go
- Why Stanley Park at golden hour makes a lot of sense
- Price and what you’re really buying for $39.49
- Where you start (and how the pacing keeps it friendly)
- Stop 1: Brockton Point Totem Pole for quick, confidence-building frames
- Stop 2: Stanley Park’s old-growth forest—more than just pretty trees
- Stop 3: Vancouver Seawall—turning long views into solid compositions
- Stop 4: English Bay at sunset—where the timing pays off
- Stop 5: Lost Lagoon—final practice in quieter light
- What you’ll learn: smartphone tips plus DSLR basics that actually transfer
- Gear: bring any camera, and don’t stress about having a DSLR
- Compliments to your future self: complimentary photos at the end
- Who should book this Stanley Park photo walk
- Should you book Photography & Walk in Stanley Park?
Quick hits before you go
- Stanley Park old-growth + sunset timing in a single, well-paced 2-hour loop
- Practical coaching for smartphone photography plus DSLR basics (aperture, shutter speed, ISO)
- Small group size (max 7) so you actually get feedback, not just a lecture
- Complimentary photos at the end that help you remember the exact angles you aimed for
- DSLR lending available, but your phone will work just fine
- Brockton Point, Seawall, English Bay, Lost Lagoon in one connected photo route
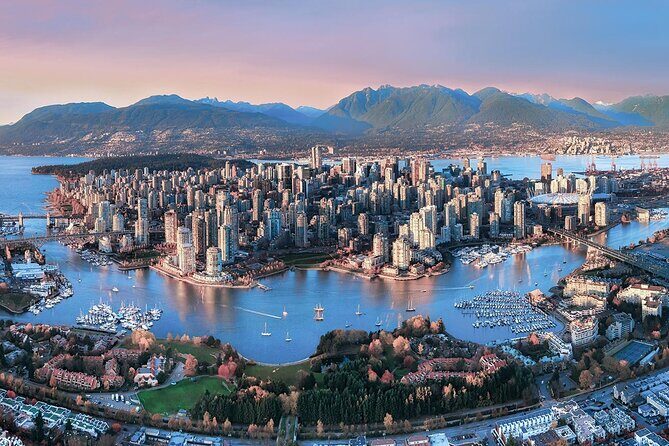
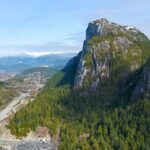
Why Stanley Park at golden hour makes a lot of sense
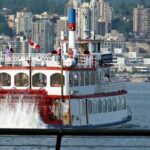
Stanley Park in Vancouver is a rare mix: dense trees, salt air, ocean views, and city energy all within a short radius. That matters for your photos because you don’t need to “plan a shoot” across multiple days. You get variety fast—forest textures, big sky, water reflections, and that classic Seawall perspective that looks great in every light.
This tour is built around the simple idea that timing is everything. Starting at 3:00 pm means you can work through the park during calmer daylight and then shift into golden and blue-hour light near English Bay. If you’ve ever felt like sunset is always just slightly out of reach, this is the kind of itinerary that tries to solve that problem for you.
I also like that the guide doesn’t assume you’re a camera expert. You’re taught the basics—how to think about composition and settings—without getting lost in jargon. You’ll leave with skills you can reuse on the rest of your trip, not just a few pretty pictures.
You can also read our reviews of more walking tours in Vancouver


Price and what you’re really buying for $39.49
$39.49 CAD for about 2 hours is not a “big splurge,” but it’s also not a generic stroll. What you’re paying for is focused instruction from a professional photographer guide, plus transportation support and complimentary photos after the shoot.
Here’s the practical value breakdown:
- You get individualized help. In a group of up to 7, there’s room for you to ask questions and get corrections while you’re outside.
- You get photo coaching that applies to your device. You can bring any camera, and DSLR gear can be borrowed if you want to experiment.
- You get photos delivered after the tour. That’s helpful if you’re traveling alone or if you want a set of images that look intentional even when the weather or lighting shifts.
One consideration: this is a walk-and-shoot experience, not a full-day production. If you want lots of downtime, long stops, or a slow museum-style pace, this may feel a bit busy. But if you’re the type who wants to get better and see the best light efficiently, it’s a fair price.
Where you start (and how the pacing keeps it friendly)
The meeting point is 655 Burrard St in Vancouver, with the tour ending back at the same location. Pickup/drop-off can be decided when you book, and for 2+ people they can arrange anywhere in Vancouver with pickup preference given to downtown.
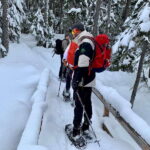
The walk is described as easy, fun, and safe, and the route can be customized based on your physical ability. That said, the provider lists a strong physical fitness level, so I’d treat this as an active outdoor photo walk—not a sit-and-stroll for limited mobility. Bring comfortable shoes and be ready to move.
The upside of the tight timing is that you won’t spend half the tour “getting there.” Transportation is included, and the plan stays concentrated around key photo zones. That’s exactly what you want in Vancouver’s coastal light, where clouds can change quickly.
Also note: food and drinks aren’t included. If you’re prone to getting hungry, grab a snack before you meet up or plan to eat after. (The tour is only around 2 hours, but sunset waits for nobody.)
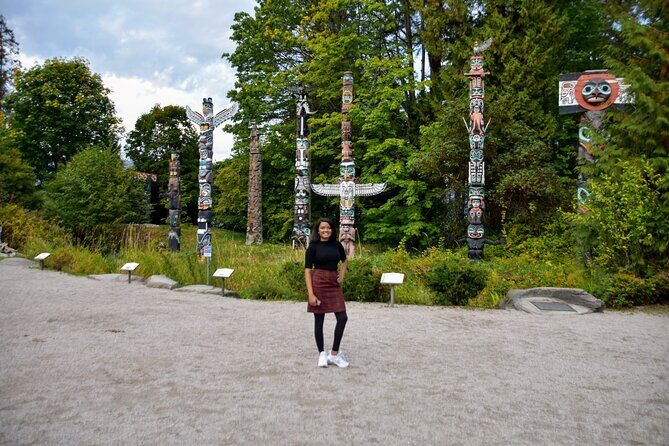
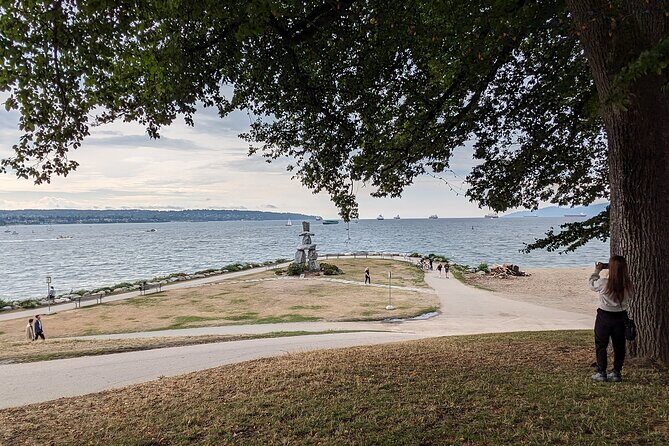
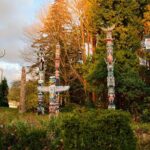
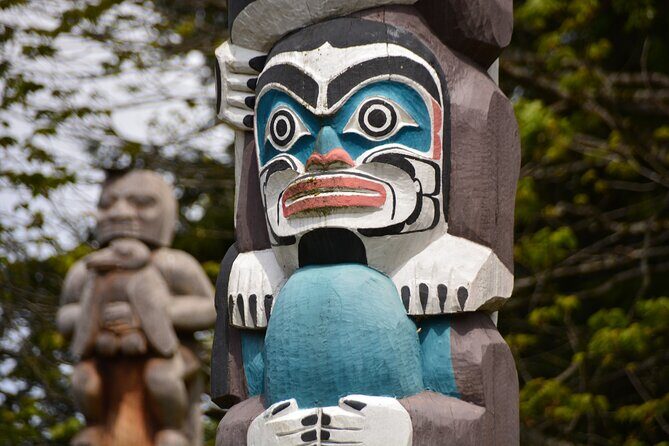
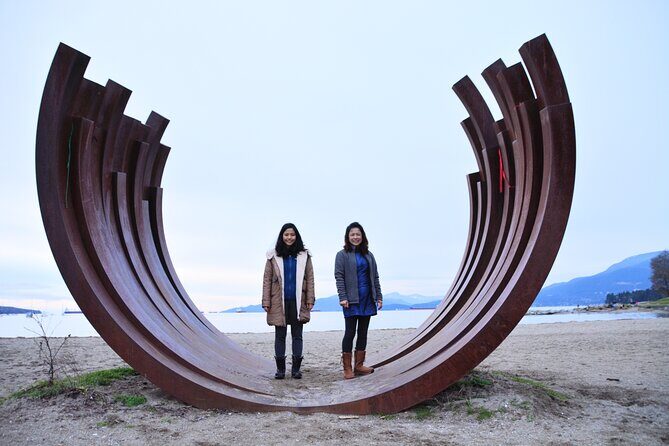
Stop 1: Brockton Point Totem Pole for quick, confidence-building frames
You’ll start with the Brockton Point Totem Pole, a strong first stop because it gives you a clear subject right away. In photography terms, you get something solid to compose—vertical shapes, carved details, and the feeling of place—without needing complicated gear.
This is a smart way to kick things off. If you’re new to manual settings or you’re still learning your phone camera, your first minutes matter. You can test framing, exposure, and focus while the group is fresh and the guide can check your approach early.
The potential drawback here is simple: it’s a popular area. Expect people and activity. That’s not a deal-breaker, but it’s a reminder that you may need patience and small adjustments to get clean compositions.
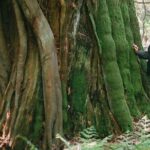
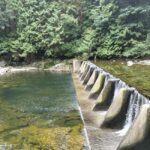
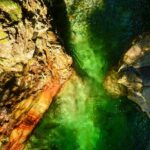
Stop 2: Stanley Park’s old-growth forest—more than just pretty trees
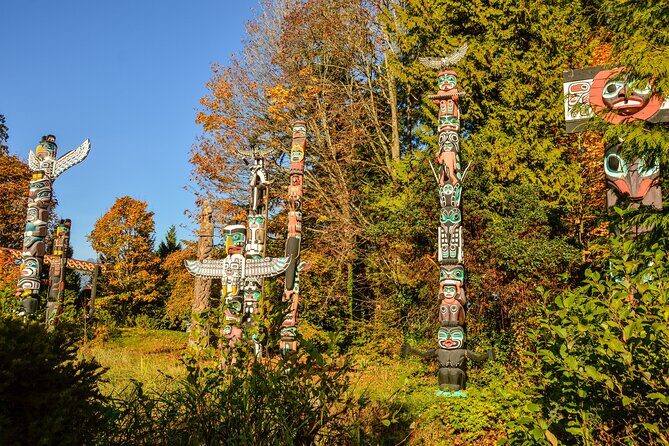
Once you’re inside Stanley Park, you shift from “icon photo” to “story photo.” Old-growth forests change the way light behaves. Shadows get softer under canopy, and the texture of bark, mossy surfaces, and layered branches gives you depth even if you’re using a phone.
This is where the coaching becomes most useful. You’ll cover composition basics and how to think about settings like aperture, shutter speed, and ISO (even if you never touch the DSLR). The goal isn’t to turn you into a technician. It’s to help you understand why a shot looks flat, why motion blur happens, or why your image gets grainy in darker areas.
You’ll also get a customized experience. If you can handle a deeper walk, you’ll go farther into the forest. If you prefer main spots only, you’ll still get variety and teaching moments. Either way, the point is the same: you’ll learn how to see and frame the park’s visual layers.
You can also read our reviews of more photography tours in Vancouver


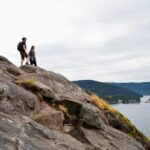
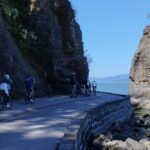
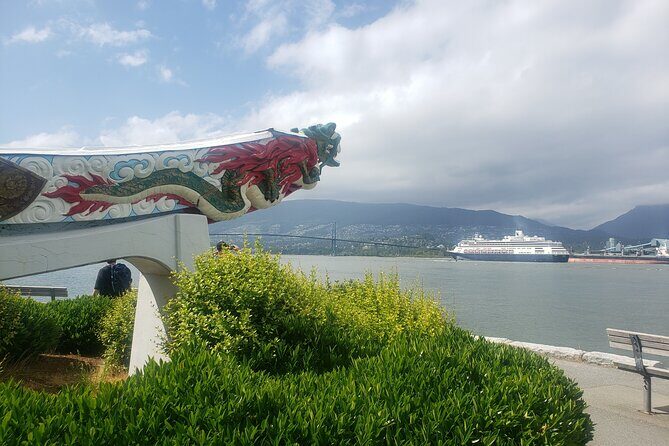
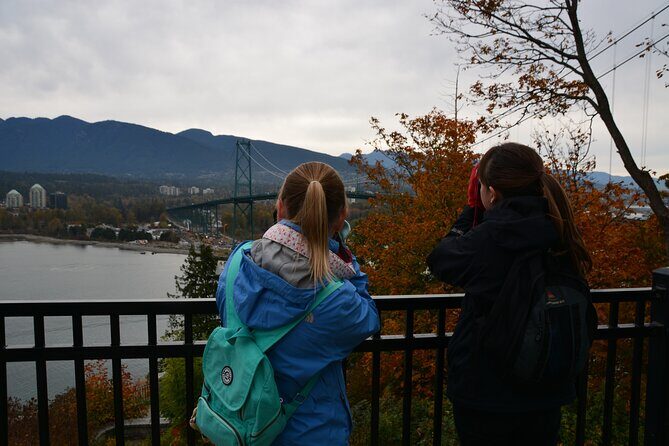
Stop 3: Vancouver Seawall—turning long views into solid compositions
The Vancouver Seawall is a photography teacher in disguise. Long sightlines, water movement, mountains in the distance, and the repeating rhythm of the path all invite composition practice.
This is also where you’ll likely notice the difference between just taking pictures and making pictures. With coaching, you can work on:
- how to balance a subject against the horizon line
- how to use leading lines from the path and shoreline
- how to handle bright sky versus darker trees
Even if you’re using your phone, you can improve fast here. The Seawall gives you a chance to experiment with framing from multiple spots without changing locations too often. That’s valuable for learning because you can compare shots and understand what changed.
One thing to keep in mind: the Seawall can be windy and breezy. It’s good for dynamic light and dramatic skies, but it can make it harder to steady a camera for tiny adjustments. If you’re sensitive to shakiness, take a breath before you shoot and use any stabilization options your phone camera offers.
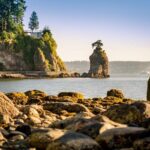
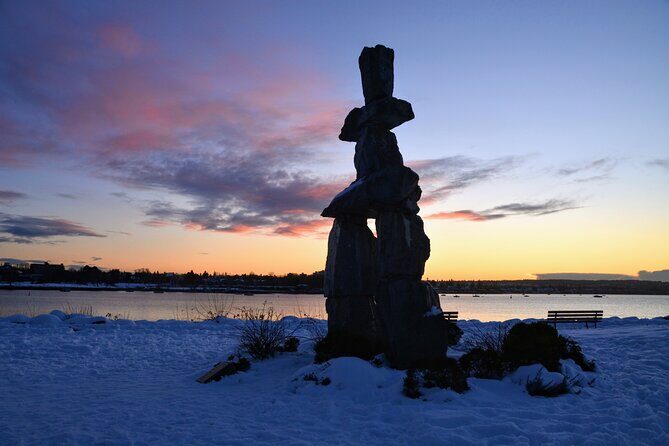
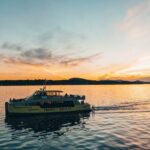
Stop 4: English Bay at sunset—where the timing pays off
The tour’s spotlight moment is catching sunset at English Bay, one of Vancouver’s most popular beaches. This is where the “3:00 pm start” isn’t just a random time. It’s what puts you in position as the light turns from bright to golden to deep blue.
Sunset scenes are where many people struggle. The sky gets bright, the foreground can turn too dark, and everything changes fast. That’s why having a guide matters. You’ll learn practical ways to think about exposure and framing so you’re not just guessing.
English Bay also brings an extra benefit: you’re right next to the city’s best food areas. The tour doesn’t include meals, but it’s easy to pair this photo walk with dinner right after. That makes the whole trip feel efficient—nature first, then a relaxed meal to end.
If weather is poor, the tour may be adjusted or canceled. The provider states this experience requires good weather, so check conditions before you set expectations for sunset.
Stop 5: Lost Lagoon—final practice in quieter light
The last stop, Lost Lagoon, gives you a change of pace from open beach views. It’s a calmer area that can help you practice a different kind of photo: stillness, reflections, and softer backgrounds.
In an itinerary like this, the value of a “quiet final stop” is huge. By the time you reach Lost Lagoon, you’ve already been through forest lighting, water-light along the Seawall, and the intense shifts of sunset. Ending in a gentler scene helps you slow down and apply what you learned without feeling rushed.
This is also where you can ask your guide for targeted help: want to improve how your phone captures darker backgrounds, or how to avoid blown highlights when the sky is bright? The tour structure makes it easier to focus on specific fixes right when you need them.
What you’ll learn: smartphone tips plus DSLR basics that actually transfer
The coaching covers smartphone tips and tricks as well as DSLR settings like aperture, shutter speed, and ISO. What I like about this combo is that it bridges the gap between “point and shoot” and “I want to understand what’s happening.”
Even if you only plan to use your phone, the DSLR concepts help you think better:
- Aperture affects depth of field and how much is sharp from foreground to background.
- Shutter speed affects motion blur and how crisp moving water looks.
- ISO affects noise/grain in darker scenes like forest shade.
The guide also teaches composition basics, which is the part people usually skip when they only focus on camera settings. Composition is what makes an image look intentional—like you’re telling a story rather than collecting a memory.
If you want a simple win, use this approach during the walk: pick one subject, compose it, then change one thing at a time. Swap your angle slightly. Adjust your framing. Then shoot again. That’s how the instruction sticks.
Gear: bring any camera, and don’t stress about having a DSLR
The tour is flexible. You can bring any type of camera and it will work. A DSLR can be borrowed if you want to try that style of shooting.
For most people, the phone is the easiest choice. You’ll likely get better results by applying the composition lessons immediately, rather than getting stuck figuring out camera modes. The guide’s focus on smartphone tips is a strong signal that this tour isn’t “only for serious photographers.” It’s for anyone who wants their photos to look better with less frustration.
If you do borrow a DSLR, you’ll still benefit from the same coaching. The settings talk will make more sense once you can try it. Just keep expectations realistic: you’re learning during a short outdoor walk, so the goal is progress, not perfection.
Compliments to your future self: complimentary photos at the end
You’ll receive complimentary photos after the tour, and there’s also a photoshoot. I’m a fan of this because it solves a common problem: the person holding the camera is often left out of the memories.
It’s also a smart way to reinforce learning. If you get a set of photos that show the best angles from each stop, you can review them later and understand what worked. Then you can recreate those approaches on your own during the rest of your Vancouver days.
This is especially useful if you’re traveling solo. Having a guide take photos in iconic spots means you don’t have to ask strangers, and you’ll get images that feel composed rather than accidental.
Who should book this Stanley Park photo walk
This works well if:
- you want sunset photos without a complex planning headache
- you enjoy learning through doing, not just watching from afar
- you’re using an iPhone or Android and want quick, practical improvement
- you’d like DSLR basics explained in plain terms
It may not be the best fit if:
- you want a totally casual walk with no photo coaching
- you have limited walking tolerance, since it’s still an outdoor walking route
- you’re hoping for included meals or long breaks (food and drinks aren’t included)
The guide can customize the route based on your physical ability, but it’s still designed for steady movement. Bring good shoes, and you’ll be glad you did.
Should you book Photography & Walk in Stanley Park?
Yes—if you care about photos and want to improve in real time, this is a solid use of an afternoon. The biggest strength is the combination of Stanley Park forest variety plus a timed push to English Bay sunset, supported by coaching you can apply immediately.
I’d book it early in your trip if possible, because the smartphone and camera fundamentals will help you take better pictures later too. If you’re flexible about weather and you’re comfortable with walking, you’ll get a lot of value from a small group and a guide who clearly knows how to turn Vancouver scenery into photos that look intentional.