REVIEW · HIKING & TREKKING
Photography & Hiking in Nature
Book on Viator →Operated by Nature PhotoHikes · Bookable on Viator
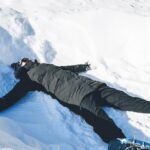
Vancouver looks better through a camera lesson. This photo-and-hike day strings together old-growth nature, city icons, and the right light at the right time. You’ll chase sunset at English Bay and then switch gears to night photos in Gastown with the Steam Clock.
I like that the photographer guide teaches practical skills for anything from smartphones to DSLRs, and you can even borrow a DSLR camera and tripod. I also like the value-add logistics: downtown pickup, included transportation, and a small group (up to 7) so you actually get time at each spot. The main consideration is physical: it’s called light hiking, but there are stairs and uneven paths, so good shoes matter.
In This Review
- Key things that make this tour work
- Vancouver’s best photo day is built for variety, not just landmarks
- Getting underway: 10:00 AM start, pickup, and how the day stays moving
- Stop-by-stop: North Shore hiking that delivers waterfall and forest texture
- Lynn Canyon Park: old-growth vibes and water-led compositions
- Lions Gate Bridge: a wide-angle city-meets-nature moment
- Stanley Park walking: totem poles, the Seawall, and view points worth the steps
- Brockton Point Totem Pole: iconic, but best when you work your angle
- Vancouver Seawall: ocean light with a steady path
- Prospect Point Lookout and Hollow Tree: viewpoints plus a bit of quirky nature
- Granville Island lunch: color, texture, and a break from the camera grind
- Gastown at night: cobblestone drama and Steam Clock lighting
- English Bay sunset plus Ilanaaq Inukshuk: the finish that feels like payoff
- How the photographer guide actually helps (not just where to stand)
- Pacing and comfort: light hiking, but stairs show up
- Transportation, group size, and why $147.87 can make sense
- Who should book this photo-and-hike day in Vancouver
- Should you book it?
- FAQ
- What time does the tour start?
- Where is the meeting point?
- How long is the tour?
- Is pickup included?
- What stops will we visit?
- Can I use my phone instead of a DSLR?
- Is a camera provided?
- Is lunch included?
- What is the group size?
- What’s the cancellation policy if the weather is bad?
Key things that make this tour work
- Photography coaching that fits your device, from iPhone-style shooting to DSLR basics
- Small group scale (max 7), which helps you keep up without feeling rushed
- Smart photo timing, including sunset at English Bay and a night stroll through Gastown
- Nature-to-city variety in one day, from North Shore forests to Stanley Park viewpoints
- Granville Island lunch stop, where you can fuel up and grab colors for photos
Vancouver’s best photo day is built for variety, not just landmarks
Vancouver can feel like two cities in one: forest trails and ocean viewpoints, then quick pivots into neighborhoods with real street texture. This tour is built around that idea. You’re not stuck in one zone. One moment you’re working with waterfall light and mossy greens. The next you’re framing totem poles and the city skyline. Then you finish with night street scenes and a classic clock landmark.
What makes this plan especially smart is the sequencing. You start on the North Shore with that lush, natural “close to the water” look. After lunch, you transition into Stanley Park’s flatter-but-view-heavy walking. Then you hit Gastown when the streets and lights are more photogenic than midday. Finally, you get the sunset-style payoff at English Bay, when the sky does its best work.
So if you’re the type who wants more than a postcard checklist, this day is designed for you. You’ll learn how to see (composition, exposure basics, moving-water settings) and you’ll get taken to places where the background isn’t just another street corner.
You can also read our reviews of more hiking tours in Vancouver
Getting underway: 10:00 AM start, pickup, and how the day stays moving
The tour starts at 10:00 am. The meeting point is the Hyatt Regency Vancouver, 655 Burrard St. It ends back at the same meeting point, so you’re not stuck figuring out a second transport plan.
Pickup is offered from downtown Vancouver, east Vancouver, or Burnaby. If you’re not in those areas, you can meet at a central location and drive to the trail. That matters because Vancouver’s sights are spread out. Having transportation built in saves you time and makes the route feel like a single continuous loop rather than a patchwork of rideshare legs.
Duration is about 7 hours. That’s long enough to do real walking, but short enough that you’re not spending your whole vacation “in transit.” The group stays small (up to 7), which also helps the pacing. The guide can stop, explain, and reposition without the whole day turning into a traffic jam.
One practical note: the operator says it runs in all weather conditions, but it also requires good weather and may be rescheduled or refunded if conditions are poor. Translation for you: bring layers and be ready for adjustments, but expect them to keep things safe.
Stop-by-stop: North Shore hiking that delivers waterfall and forest texture
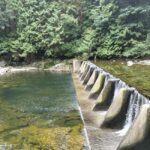
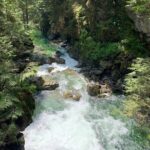
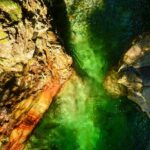
Lynn Canyon Park: old-growth vibes and water-led compositions
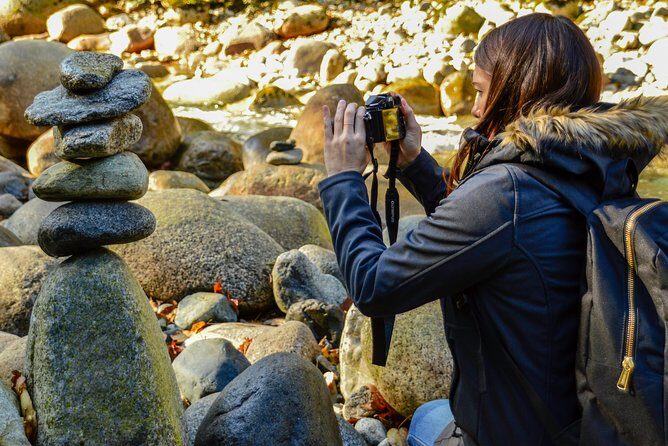
Your day opens at Lynn Canyon Park. This is where you get the “wow, Vancouver is actually a rainforest” moment—big trees, natural pools, and waterfalls. For photography, this area gives you easy subjects: water motion, reflections, layered foliage, and that thick woodland depth you can’t fake.
There are two different photo challenges here:
- Moving water: you’ll want to control shutter speed so water looks smooth rather than chaotic.
- Dim forest light: you’ll learn what to change so the subject pops instead of turning into a dark blob.
The hiking is described as light-to-moderate, but stairs and uneven surfaces are part of the deal. Plan for short bursts of effort followed by time to shoot. If you want the forest look without feeling like you’re doing a grueling hike, this is a good opening act.
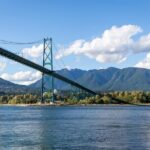
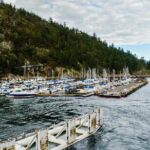
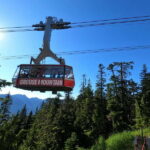
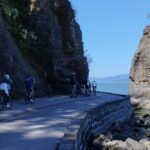
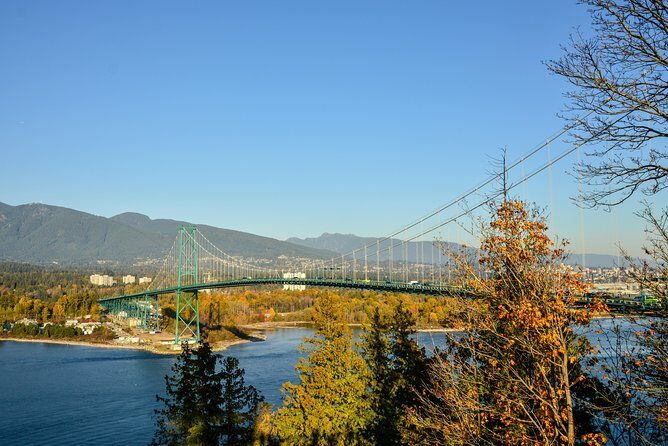
Lions Gate Bridge: a wide-angle city-meets-nature moment
Next up is Lions Gate Bridge. This is your switch from micro-details (water, texture) to bigger framing. Bridges give you strong lines, and they’re perfect for learning how to compose with foreground, midground, and background all at once.
Even if you’re using a phone, this is a great lesson zone because you’ll likely stand at places where the scene is bigger than your lens normally “sees.” The guide’s job here is to help you simplify the frame and not let your photo become a cluttered skyline mess.
You can also read our reviews of more photography tours in Vancouver

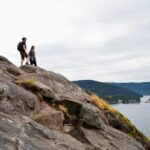
Stanley Park walking: totem poles, the Seawall, and view points worth the steps
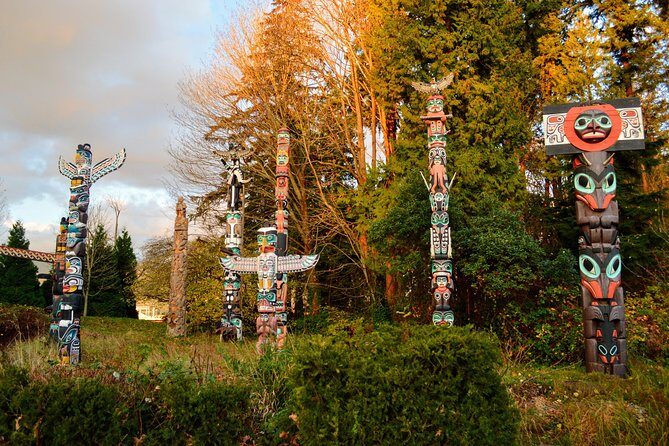
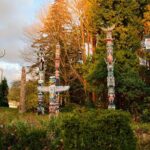
Brockton Point Totem Pole: iconic, but best when you work your angle
Brockton Point Totem Pole is a classic stop for a reason. Totem poles are graphic shapes, and they photograph well in both daylight and overcast. The trick is angle and background. If you place the pole against a calmer sky or water-toned background, the carving details look sharper.
This is also a good place to practice “fill the frame.” It’s easy to overshoot and get a pole that looks small inside a wide shot. Your guide will likely steer you toward tighter composition so the subject feels intentional.
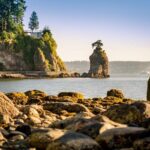
Vancouver Seawall: ocean light with a steady path
Then you move along the Vancouver Seawall. This is where you get walking that feels scenic rather than steep. You’ll be able to aim your camera for ocean color, shoreline textures, and distant city elements.
For photography practice, the Seawall is great because you can experiment while moving. The guide can show you how to keep the horizon steady, how to use leading lines, and how to handle changing light as you step along the route.
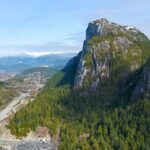
Prospect Point Lookout and Hollow Tree: viewpoints plus a bit of quirky nature
Later you’ll reach Prospect Point Lookout and Hollow Tree. These stops tend to deliver the “stand and frame” feeling. If you like wide scenic shots, Prospect Point is your chance. If you prefer something more specific and character-heavy, Hollow Tree adds an unusual subject that breaks up the classic skyline view.
This is also where you start feeling the day in your legs. You’ll still be at a manageable pace, but expect stairs and steps to show up again. The best move is to slow down during shooting time, not during walking time.
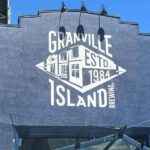
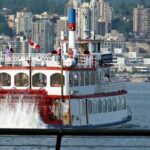
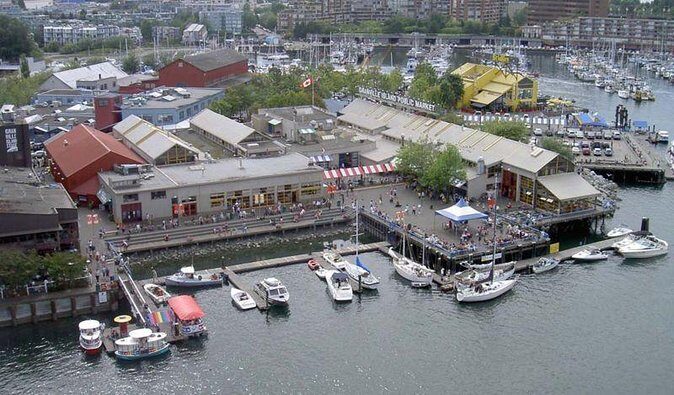
Granville Island lunch: color, texture, and a break from the camera grind
Next is Granville Island. You’ll eat lunch at the famous market and photograph around the area. Food isn’t included, so you’ll choose what you want to buy there.
Why this stop matters: it’s not just a break. Granville Island is a color playground. You get signage, market stalls, textured buildings, and people in motion. That gives you plenty of photo options without needing a perfect landscape viewpoint.
If you’re shooting with a phone, Granville Island is ideal for learning “street photo basics.” How do you frame without overthinking? How do you keep subjects sharp? How do you use exposure so bright stalls don’t blow out while darker areas stay usable?
Also, take this lunch time seriously. Bring water, and use the break to reset your camera settings (especially if you’ve been messing with exposure for water and forest shots). Your sunset photos later will be easier if you’re not starting the day’s last half already tired.
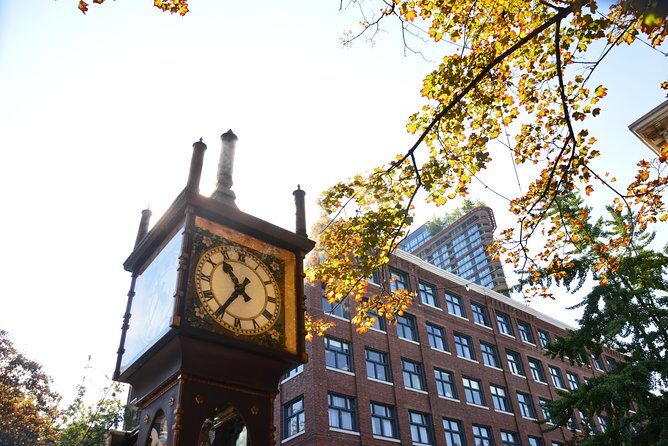
Gastown at night: cobblestone drama and Steam Clock lighting
After lunch, you go to Gastown, including the Steam Clock. Gastown is where Vancouver leans into mood. Cobblestone streets, streetlights, and that industrial-meets-quirky vibe. It’s exactly the kind of place where a guide helps you avoid common phone-camera mistakes like:
- letting highlights turn into white blobs
- keeping the subject too small
- shooting without a clean foreground anchor
This is also where you’ll appreciate the “photographer” part of the tour. Night photography isn’t just pointing and tapping. Even basic lessons can help you get sharper results and more controlled lighting.
You’ll walk through the area at night and focus on getting those iconic shots without rushing. The difference between a decent photo and a great one often comes from standing still for 30 extra seconds and trying one more angle. That’s what this stop is good for.
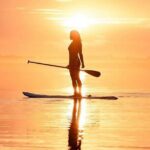
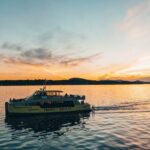
English Bay sunset plus Ilanaaq Inukshuk: the finish that feels like payoff
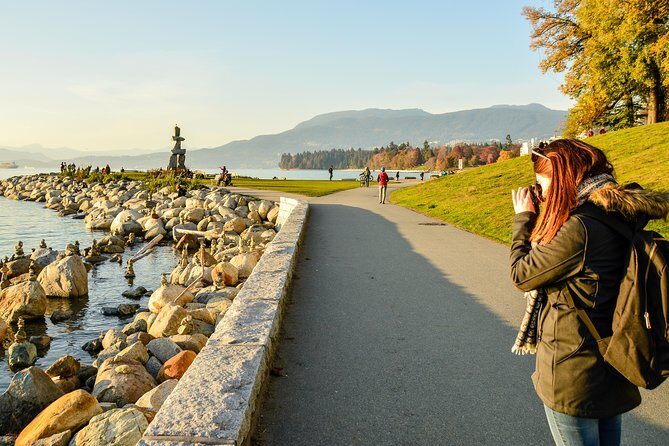
You end with English Bay, a planned sunset photo moment. Sunset is the obvious highlight, but the real value is learning why sunset makes photos easier. The light is softer. Shadows are more forgiving. Colors in the sky and on the water create natural contrast.
English Bay also gives you “big sky” compositions that scale well from phones to DSLRs. If you want reflections, you’ll be in the right zone. If you want silhouette-style shots, you’ll be in the right zone. And if you just want a clean, calm horizon line, this is the easiest place on the route to get that look.
Before English Bay, you’ll also stop at Ilanaaq Inukshuk. That adds cultural and visual interest to the ending sequence. A symbol like that can give your photos a strong focal point when the scenery is broad.
How the photographer guide actually helps (not just where to stand)
A good photo tour isn’t only about location. It’s about what you do with the location. This guide teaches photography basics for the camera you’re using, and the tour is flexible enough to work with smartphones or DSLRs.
If you’re on a phone, focus on these types of lessons:
- how to set up for moving water shots (so waterfalls and pools don’t look like blurry gray mush)
- how to frame still subjects so details stay sharp
- how to use editing to bring out color layers without wrecking skin tones or sky gradients
If you’re shooting with a borrowed DSLR camera and tripod, you’ll likely get hands-on guidance that helps you understand what settings change and why. Tripods are huge for this itinerary because water and night scenes can reward steady shooting.
One more thing I like: the guide doesn’t rush you through the places. On a day like this, rushing is what kills photos. You need time to try one angle, then try another. And if you want to experiment, this tour’s pace supports that.
Pacing and comfort: light hiking, but stairs show up
This is labeled as light hiking and walking, and most travelers can participate. Still, real Vancouver terrain means stairs and uneven ground. One review noted lots of stairs. Another mentioned that a portion can feel strenuous, and the guide helped keep pace for slower members.
So here’s your practical checklist:
- Wear grippy shoes. Wet rock plus stairs is no joke.
- Dress in layers. Even if the day is sunny at one stop, you can hit damp forest air on another.
- Plan for breaks. You’ll get them naturally while shooting, but if you need rest, ask.
Because it runs in all weather conditions, don’t treat rain as an automatic cancellation. Instead, treat it as “bring the right gear so you can keep shooting.”
Transportation, group size, and why $147.87 can make sense
The price is $147.87 per person for about 7 hours, including:
- downtown pickup and drop-off
- a professional photographer guide
- transportation between multiple sites
- guided walking/hiking with photoshoot time
- a chance to borrow a DSLR camera and tripod (if you need it)
Food and drinks are not included, which is normal for a market lunch stop.
Here’s how I think about value for this kind of day: you’re paying for time, coaching, and logistics. You could rent a car and drive yourself, but you’d lose the photo teaching, and you’d still have to coordinate timing for sunset and night Gastown. This tour bundles those parts for one set price.
Also, max group size matters. With only up to 7 people, the guide can focus on your camera questions and adjust the pace. That’s a real cost saver in attention and frustration.
Who should book this photo-and-hike day in Vancouver
This tour is a strong fit if:
- you want classic Vancouver hits plus real nature in one day
- you’re returning to the camera shop after a trip and want your photos to look smarter
- you prefer a small-group experience over big-bus sightseeing
- you’re traveling with a phone and want quick, usable tips (not theory)
It’s also a good choice for families or mixed-age groups, as long as everyone is comfortable with walking and some stairs. The tour isn’t built for wheelchair-level movement based on the walking described, but it is built for variety and pacing.
If you hate crowds and want uncrowded photo opportunities, this style of guide-driven route tends to be more satisfying than simple sightseeing loops.
Should you book it?
I’d book this if your goal is a better-looking Vancouver day, not just a list of stops. The mix of North Shore forests, Stanley Park viewpoints, Granville Island lunch, and end-of-day English Bay sunset plus Gastown at night gives you multiple photo styles in one outing. Add practical coaching for smartphones and DSLRs, and you get a skill payoff, not just a sightseeing pass.
I’d hesitate only if stairs and uneven ground are a hard no for you, or if you’re expecting food to be included. Bring good shoes, plan to buy lunch at the market, and come ready for a full, camera-focused day.
FAQ
What time does the tour start?
It starts at 10:00 am.
Where is the meeting point?
The meeting point is Hyatt Regency Vancouver, 655 Burrard St, Vancouver, BC V6C 2R7, Canada.
How long is the tour?
The duration is about 7 hours.
Is pickup included?
Yes. Downtown pickup and drop-off are included. Pickup can be arranged from downtown Vancouver, east Vancouver, or Burnaby.
What stops will we visit?
Stops include Lynn Canyon Park, Lions Gate Bridge, Brockton Point Totem Pole, Vancouver Seawall, Granville Island, Gastown (Steam Clock), Prospect Point Lookout, Hollow Tree, English Bay, and Ilanaaq Inukshuk.
Can I use my phone instead of a DSLR?
Yes. The tour is suitable for any kind of camera, from smartphones to DSLRs, and the guide provides photography basics.
Is a camera provided?
A DSLR camera and tripod can be borrowed.
Is lunch included?
Lunch at Granville Island’s market is part of the day, but food and drinks are not included.
What is the group size?
The maximum group size is 7 travelers.
What’s the cancellation policy if the weather is bad?
Cancellation is free. You can cancel up to 24 hours in advance for a full refund. If the experience is canceled due to poor weather, you’ll be offered a different date or a full refund.