REVIEW · CYCLING TOURS
Vancouver E-Bike Rentals – Premium Seawall Bike Path Location
Book on Viator →Operated by Alien Adventures · Bookable on Viator
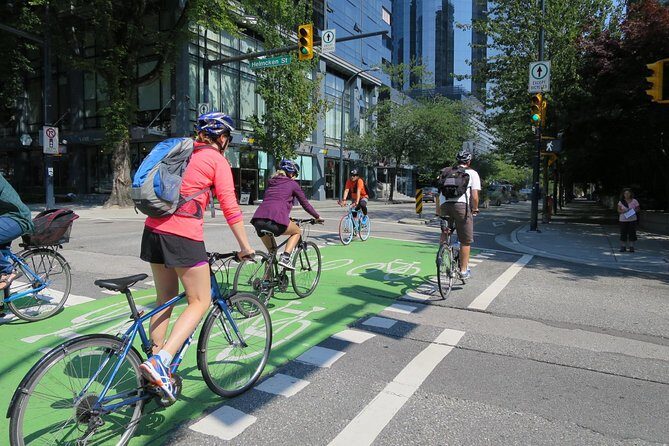
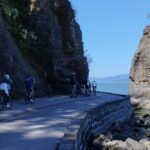
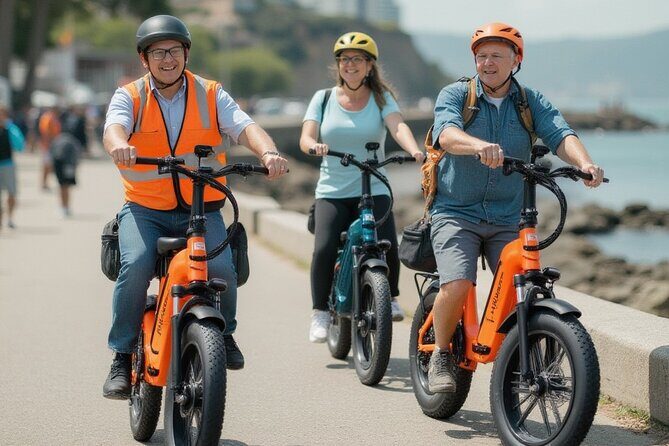
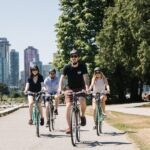
Waterfront biking, minus the stress. This 3-hour self-guided e-bike ride takes you along Vancouver’s famous Seawall path, with views of English Bay and the Lions Gate Bridge, plus a route that loops through major highlights at your own pace.
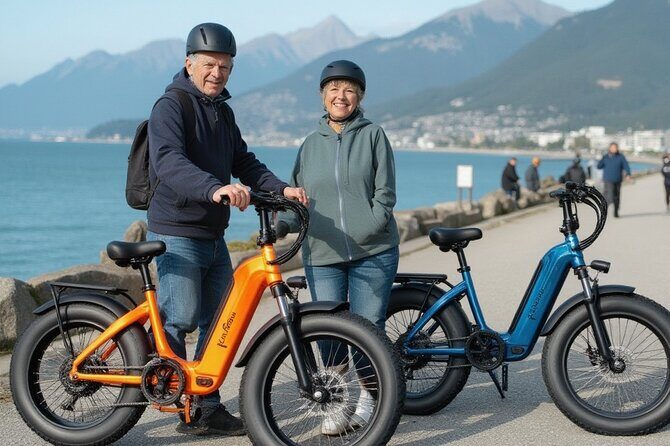
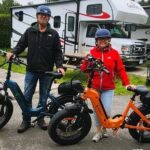
I like the confidence factor built into this setup: bike locks and safety gear are included, and the shop’s location is right on the bike path at Plaza of Nations (so you’re not guessing how to get on the waterfront trail).
One note to keep in mind: an e-bike feels different from a regular bike. A rider in my circle found it heavier and needed a bit more effort at first, so it helps to try it out before you roll and keep a steady, comfortable pace.
In This Review
- Key Things I’d Look For Before You Ride
- Seawall Infinity Loop: Why This Ride Works So Well in 3 Hours
- Plaza of Nations Start: Built for Getting On the Path Fast
- The E-Bike Reality Check: Smooth Help, Different Weight
- Safety Setup You Don’t Have to Think About
- Following the Route Without Getting Lost (Because You’re Self-Guided)
- Stops That Give You That Vancouver-Classic Feeling
- English Bay and Lions Gate Bridge Views
- Granville Island: A Lively Detour by Bike
- Olympic Village: Another Shift in Vibe
- Stanley Park Icons: Totem Poles and A-Maze-ing Laughter
- A Surprise Moment (Geese and an Unexpected Heated Pool)
- Timing and Pace: Making the Most of a 3-Hour Ride
- Where This Experience Delivers Value (and Where It Might Not)
- Who Should Book This E-Bike Rental?
- Quick Tips Before You Go
- Should You Book It?
- FAQ
- How long is the e-bike rental experience?
- Where do I pick up the e-bike?
- Is this ride guided or self-guided?
- What safety items are included?
- Who can ride the e-bike?
- What if the weather is bad or I need to cancel?
Key Things I’d Look For Before You Ride
Prime Seawall access at Plaza of Nations (750 Pacific Blvd, right on the bike path by Plaza Aqua Ferry Terminal)
Safety gear + bike locks included so you can focus on cruising, not worrying
A self-guided tour map that helps you follow the loop without turning it into a navigation project
Staff advice before you go if you want a quick suggestion on where to spend extra time
Great variety of sights along the Seawall Infinity Loop, including Stanley Park icons and downtown waterfront stops
Seawall Infinity Loop: Why This Ride Works So Well in 3 Hours
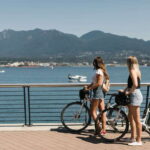
Vancouver is one of those cities where biking is not just allowed, it’s part of the rhythm. And on the Seawall, the timing and the setting make everything feel easy. You get ocean air, famous skyline angles, and long stretches where you can settle into a smooth rhythm instead of constantly stopping.
This experience is built around the Seawall Infinity Loop, a route that’s designed for sightseeing without feeling like a full-day training plan. Because it’s self-guided, you’re not locked into a strict group schedule. If you want extra time for photos, a coffee, or a slower stretch near the water, you can do that. If you’d rather keep moving, you can.
The big win is how much you can see without cramming. In about 3 hours, you can hit a sequence of major Vancouver moments: the waterfront views, the central waterfront energy, and then into the Stanley Park area where the vibe changes into something quieter and more iconic.
You can also read our reviews of more cycling tours in Vancouver
Plaza of Nations Start: Built for Getting On the Path Fast

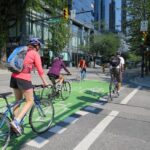
Your ride starts back at the shop at Plaza of Nations, at 750 Pacific Blvd. The location matters more than you might think. This is not a “walk to the trail and hope you’re on the right side” kind of start. The shop is positioned directly on the e-bike path on the right side of the AAA Bike Lane, next to the Plaza Aqua Ferry Terminal.
That means fewer start-up headaches for you, and more time actually riding. It’s also a smart move for safety and peace of mind: you’re getting onto a dedicated bike corridor instead of threading through traffic.
There’s also a practical bonus here. The shop has a large area to try the e-bike beforehand, so you can get comfortable with the feel before you commit to the waterfront loop. If you’re new to e-bikes, this is a big help.
The E-Bike Reality Check: Smooth Help, Different Weight
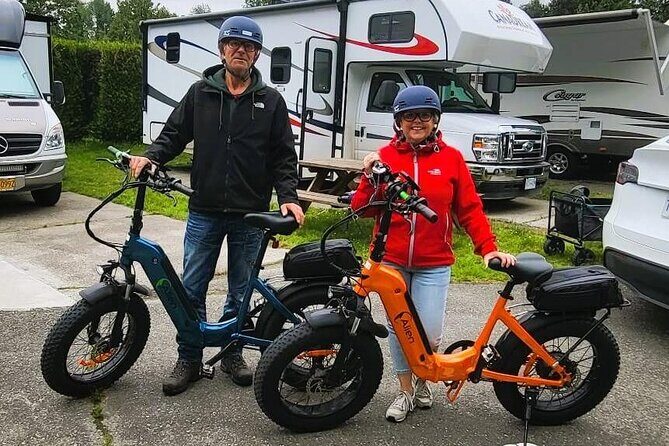
Let’s talk truth about e-bikes. They make cycling easier, but they do not behave like a lightweight city bike. The motor and battery add weight, and that can surprise you at first.
If you’re coming from a regular bicycle, expect the bike to feel heavier to handle—especially when you’re stopping, starting, or maneuvering at low speed. That’s not a deal-breaker, but it is something to plan for. Take advantage of the pre-ride practice area. Get a feel for:
- How the bike balances when you’re turning slowly
- How quickly you accelerate when the assist kicks in
- How much room you want when you stop
The payoff is that once you’re rolling, the e-bike help really makes the route comfortable. You spend more time enjoying the views—rather than burning energy just to keep pace. And with the safety gear and locks included, you’re also better set up for stops.
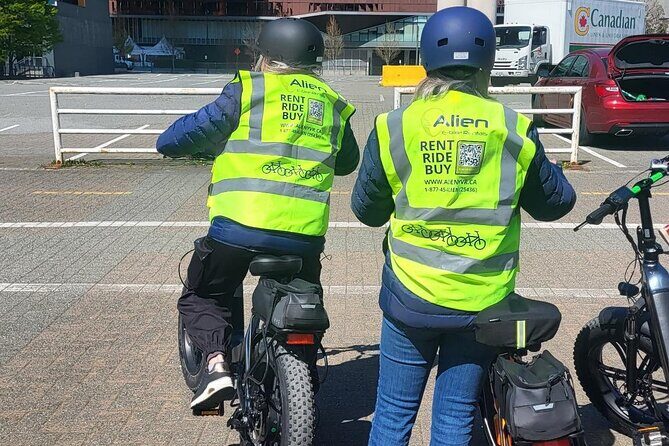
Safety Setup You Don’t Have to Think About
This is one of the stronger parts of the experience. They provide bike locks and safety gear right with the rental. That’s the kind of detail that saves you from scrambling mid-day.
It also changes your mental math. When you know you can secure the bike and you’ve got the safety essentials, you’re more likely to take advantage of small stops for a snack, a photo break, or a quick wander near the water.
And because the shop is right on the path, there’s less stress about getting positioned. You’re also not alone on the planning side. Staff are ready to offer advice about where to explore before you set off, plus you get a map so you can follow the route without turning the day into a guessing game.
Following the Route Without Getting Lost (Because You’re Self-Guided)
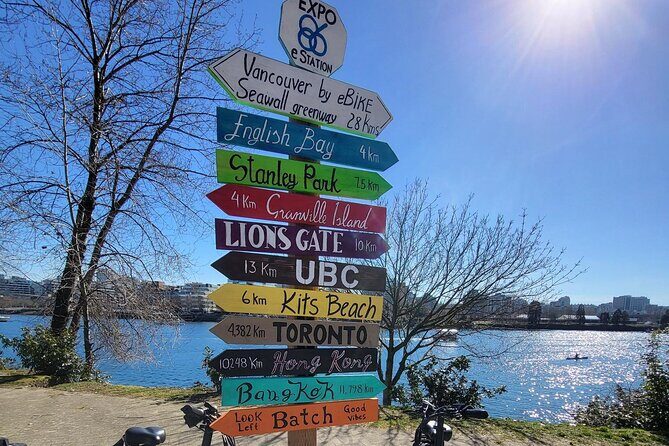
This is a self-guided experience. The key is that you’re given an included self-guided tour map, and the route logic is straightforward: it’s built around the Seawall Infinity Loop.
Here’s what that means for your day:
- You can move at your own pace
- You can stop where it feels good, not where a group leader says
- You can spend more time where the views or scenery grab you
The included map takes the guesswork out of where to go next, so you’re not constantly checking your phone. That matters on a waterfront ride where you want to keep your attention on the path, the water, and other cyclists.
If you’re the type who likes to understand the route before you roll, use the staff advice at the start. Quick questions like where to slow down, where the nicest photo stretches tend to be, or which sections are easiest can help you shape your ride in the first hour.
You can also read our reviews of more tours and experiences in Vancouver

Stops That Give You That Vancouver-Classic Feeling
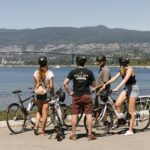
The route is designed to string together the sights people actually come to Vancouver for. Along the Seawall Infinity Loop, you’ll pass through well-known areas and landmarks, with enough time to pause and take in the details.
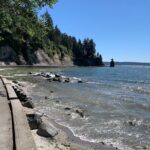
English Bay and Lions Gate Bridge Views
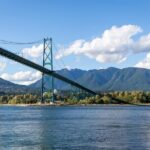
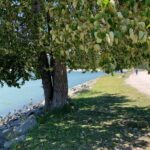
As you ride the waterfront, you’ll get that postcard feeling where the ocean and the city line up nicely. The Seawall is a great place to see Vancouver from the level of the people living and strolling here, not from behind a car window.
Keep an eye out for the angles toward the Lions Gate Bridge—these views make great photo moments and, more importantly, they’re just plain enjoyable to watch while you cruise.
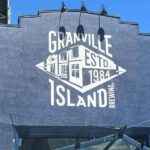
Granville Island: A Lively Detour by Bike
The loop also connects you toward Granville Island, a popular spot that tends to feel different from the rest of the waterfront. Expect a change in scenery and atmosphere, and use that as a reason to slow down. Even if you don’t go far on foot, the bike ride near Granville helps break the day into variety.
This is also a good section to grab a snack or coffee if you want a mid-ride reset.
Olympic Village: Another Shift in Vibe
From the waterfront highlights, the route continues into Olympic Village. You’re still on the move, but the surroundings feel more urban and modern than some of the quieter stretches. It’s a useful contrast: the day doesn’t become one long sameness line.
If you want more city energy during your ride, this is where you’ll feel it.
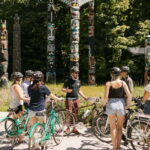
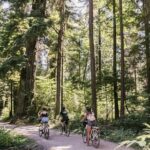
Stanley Park Icons: Totem Poles and A-Maze-ing Laughter
One of the most recognizable parts of the route is the Stanley Park area. You’ll have stops connected to Stanley Park’s totem poles and the A-Maze-ing Laughter statues.
These are exactly the kind of stops that justify going by bike instead of bus or walking. You can reach them, pause for photos, and then keep moving without losing most of your time to transit.
Practical tip: set aside time for these. Iconic stops often take longer than you expect when you’re trying to photograph properly from a good angle.
A Surprise Moment (Geese and an Unexpected Heated Pool)
One fun detail that came up in feedback: riders have spotted geese and a heated pool along the ride. That kind of thing is impossible to guarantee in the exact moment, but it’s a reminder that waterfront biking in Vancouver often includes little real-life surprises. Go in with curiosity, not just a checklist.
Timing and Pace: Making the Most of a 3-Hour Ride

For a 3-hour outing, the biggest secret is pacing yourself in the first 30 minutes. If you burn your energy early, you’ll rush later just when the best photo spots start calling.
I suggest you:
- Start steady, not sprinty, especially if you’re learning the e-bike feel
- Take your first real stop after you’ve gotten comfortable with the bike
- Save a longer pause for Stanley Park area landmarks
Because the route is built for sightseeing, you’ll likely want to stop more than once. That’s the point. People use this kind of loop to see Vancouver highlights without spending the whole day doing logistics.
And with e-bike assist, you can keep the ride relaxed. You’re still moving under your own power, but you’re not constantly battling the terrain or the effort.
Where This Experience Delivers Value (and Where It Might Not)
Let’s talk price. It’s $63.84 per person for about 3 hours, with a mobile ticket and included safety gear and locks. For a waterfront ride that covers multiple major zones (plus Stanley Park highlights), that price can feel fair—especially if you’re using the e-bike help to make the full loop doable without exhausting yourself.
You’re paying for three things:
- Access to a high-quality rental setup
- Time-saving ease with prime waterfront starting access
- Included safety gear/locks plus a map, so you’re not doing extra work
Where it may not fit:
- If you only want one or two quick stops and plan to do the rest by foot, the value might feel less obvious.
- If you dislike riding on busy shared paths, you may prefer a quieter walking-based itinerary instead.
- If you’re very sensitive to handling heavier bikes, take the practice period seriously.
Also note: the experience is for riders with moderate physical fitness, and the route is for any rider over 14.
Who Should Book This E-Bike Rental?
This one is a good match for:
- First-timers who want a high-impact Vancouver highlight ride
- People who like independence but don’t want to over-plan navigation
- Travelers who want great views without spending the whole day on their feet
- Anyone who benefits from e-bike assistance but still wants to feel like they’re actively exploring
It’s also smart if you’re traveling with mixed energy levels. You can slow down, speed up, stop for photos, and generally shape the day to your group without waiting on a slow-moving train of feet.
Quick Tips Before You Go
A few small things that make a big difference:
- Try the bike first. Use that large practice area to get comfortable.
- Plan for photo stops. This ride is a camera-friendly loop—give yourself permission to pause.
- Ask staff one question. Where to linger and where to keep moving usually takes seconds, and it can improve your whole route.
- Dress for coastal weather. Vancouver can be breezy, even when it looks calm.
If you do those, you’ll get a smoother ride and a more enjoyable rhythm.
Should You Book It?
Yes, I’d book this if you want a simple, scenery-heavy way to experience Vancouver’s waterfront highlights in about half a day, without getting buried in planning. The Seawall bike path location at Plaza of Nations is a real advantage, and the included safety gear, bike locks, and self-guided map make it feel like a complete package rather than a rental where you’re on your own.
The only strong reason to hesitate is if you’re worried about bike handling due to the extra weight. If that’s you, just be patient at the start and use the practice area. After that, it’s a relaxing, rewarding way to see Vancouver from the waterline up.
FAQ
How long is the e-bike rental experience?
It runs for about 3 hours, and it ends back at the same meeting point where you started.
Where do I pick up the e-bike?
Pick-up and drop-off are at E-Bike Rentals Vancouver Powered by Alien, located at 750 Pacific Blvd, Vancouver, BC V6Z 3A1, right on the bike path next to the Plaza Aqua Ferry Terminal.
Is this ride guided or self-guided?
It’s self-guided. You’ll receive a self-guided tour map so you can follow the route at your own pace.
What safety items are included?
Bike locks and safety gear are included with the rental.
Who can ride the e-bike?
The route is stated as suitable for riders over 14, and travelers should have a moderate physical fitness level.
What if the weather is bad or I need to cancel?
The experience requires good weather. If it’s canceled due to poor weather, you’ll be offered a different date or a full refund. You can also cancel for a full refund up to 24 hours before the start time.