REVIEW · PHOTOGRAPHY SESSIONS
Art of Street Photography Guided Walk
Book on Viator →Operated by Street16 Photography · Bookable on Viator
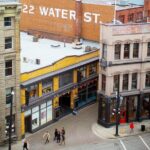
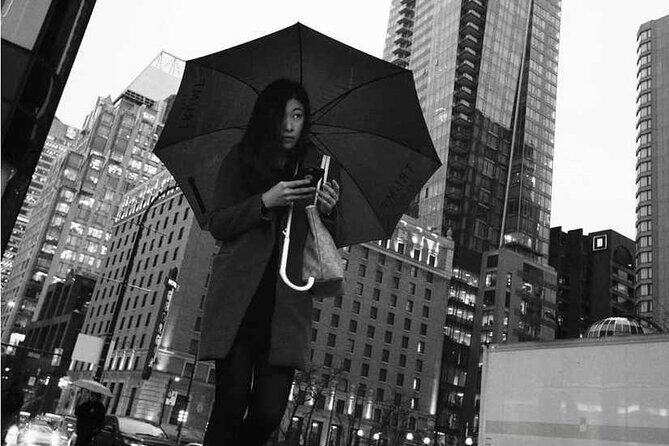
Downtown Vancouver turns into your photo classroom fast. In just two hours, you practice candid city watching, working with light and shadow instead of hunting for perfect scenes. You’ll learn to spot silhouettes, reflections, and those quick interactions between strangers that make urban life feel real.
Two things I really liked: the guides, Chris and Jake, are patient and slow down when you need it, and they actually tailor the walk to what you’re trying to photograph. One consideration before you go: you’ll want to bring your own camera or phone—photo equipment isn’t included.
In This Review
- Key Takeaways Before You Go
- Downtown Vancouver Street Photography: What You’ll Be Doing
- Why this matters for your photos
- Meet at 725 W Georgia St: The Walk’s Pace and Setup
- What the first minutes usually feel like
- Downtown’s Visual Rules: Light, Shadow, Silhouettes, Reflections
- A tip you can use immediately
- Chris and Jake’s Style: How They Tailor the Route to You
- If you’re not a photographer
- How to get the most from the coaching
- Coffee and a Free Ticket: Where the Value Really Comes From
- Value checklist you can use
- What to Bring (Since Photo Gear Isn’t Included)
- Who Should Book This Street Photography Walk?
- Should You Book the Art of Street Photography Guided Walk?
- FAQ
- How long is the Art of Street Photography Guided Walk?
- Where does the tour start?
- Does the tour end at the same place?
- What is included in the tour price?
- Is photographic equipment included?
- What language is the tour offered in?
- What group size should I expect?
- What weather conditions are required?
Key Takeaways Before You Go
- Max 6 people means you get real attention, not a rushed line-through-the-streets tour
- Downtown Vancouver focus keeps your practice tight: reflections, shadows, and silhouettes
- Chris and Jake start by asking your interests so the route fits your style
- Coffee and/or tea included keeps the energy up during the walk
- You don’t need a big day planned: it’s about a focused 2-hour session you can repeat
Downtown Vancouver Street Photography: What You’ll Be Doing
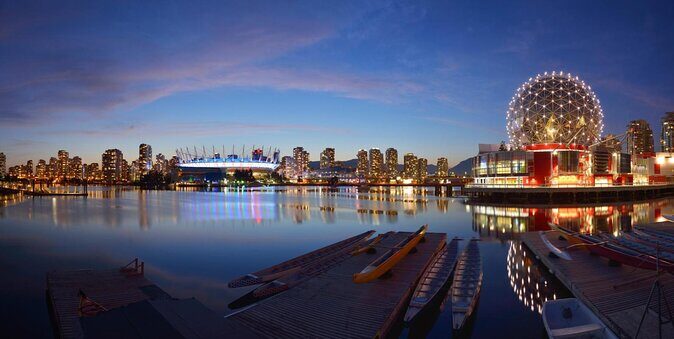
This is a guided street photo walk built around one simple idea: you don’t need a special location to get great images. You need a way of seeing. Downtown Vancouver is full of angles, glass, and high-contrast light, so it’s a strong place to train your eye.
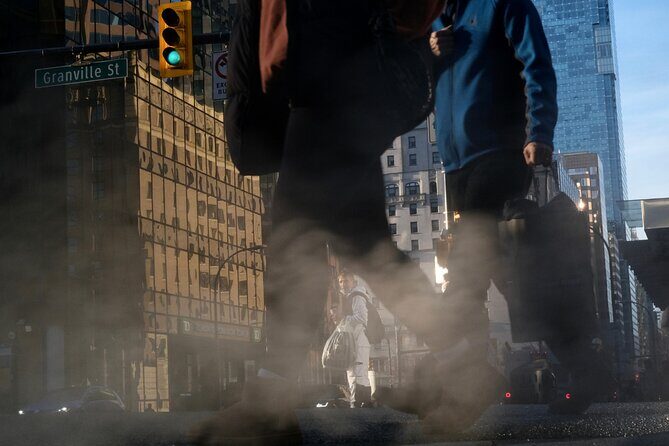
During the walk, you’re not just “taking photos.” You’re practicing how to turn everyday moments into compositions. That means paying attention to the look of a scene the moment it appears—maybe it’s a fleeting glance, a small gesture, or two strangers sharing a bit of space. The goal is to help you capture the feeling of the city, not just a postcard view.
The guides also guide you toward using the built environment as your photo partner. Think: street-level scenes shaped by architecture, window reflections, and shadow patterns that cut across the sidewalk. When light hits a surface just right, your subject can become sharper even if nothing “big” is happening.
You can also read our reviews of more walking tours in Vancouver


Why this matters for your photos
If you’ve ever felt like you’re walking around with your camera but coming home with only okay shots, this type of workshop helps fix that. Instead of random shooting, you get a short path with specific visual goals. After a couple of practice rounds, you start seeing the same patterns faster—especially contrast, silhouette shapes, and reflective surfaces.
Meet at 725 W Georgia St: The Walk’s Pace and Setup
You’ll start at 725 W Georgia St in downtown Vancouver. The location is a good sign: it’s centrally placed and close to public transportation, so you’re not forced into a long commute just to begin shooting.
The experience runs about 2 hours, and it ends back at the meeting point. That round-trip structure matters. It keeps the timing manageable, and it helps you plan your day. It also means you can fit this into a first or second day in town without it taking over your schedule.
The group size caps at 6 travelers, and that changes how the walk feels. You’re more likely to get specific feedback, and it’s easier for the guides to watch what you’re doing. In a small group, you can ask questions without feeling like you’re slowing everyone down.
What the first minutes usually feel like
The guides will check in on your interests early. Based on past participants, they start by asking what kind of street images you want—so your route isn’t just the same set of stops for every person. That helps, even if you’re a beginner. You’ll get directions that match what you’re trying to make, not generic tips.
And yes, there’s a moderate physical fitness expectation. This is a walk. You’ll want comfortable shoes, and you’ll benefit from being ready to move at an easy walking pace.
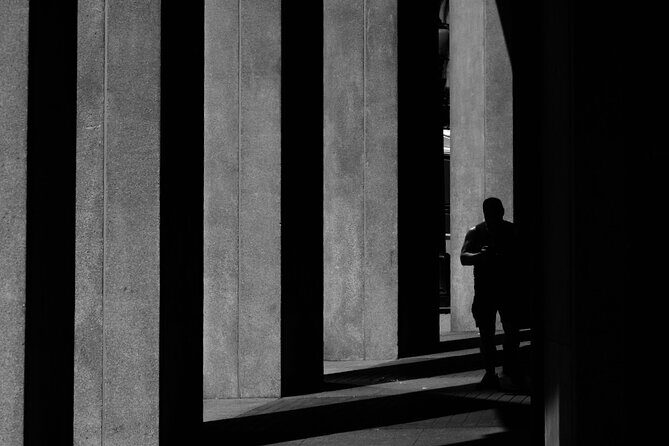
Downtown’s Visual Rules: Light, Shadow, Silhouettes, Reflections
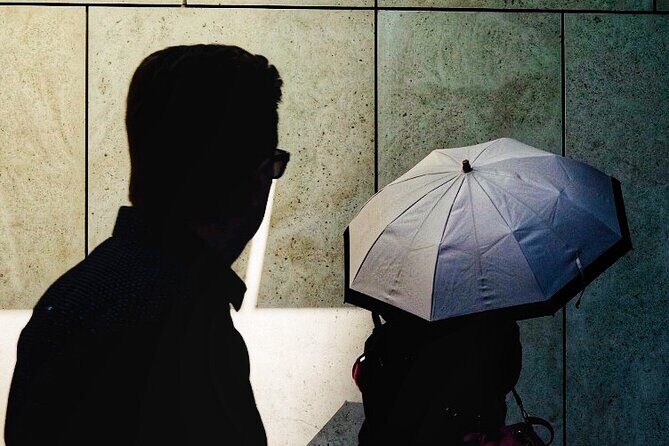
The core of the walk is downtown Vancouver, and the focus is very specific. You’ll spend time looking at how light behaves in the city: shadows with clean edges, silhouettes that turn passersby into graphic shapes, and reflections that layer the scene.
Here’s the practical side of what you’ll be training:
- Silhouette spotting: When the background is brighter than your subject, shapes take over. You’ll learn to position yourself so the light does the heavy lifting.
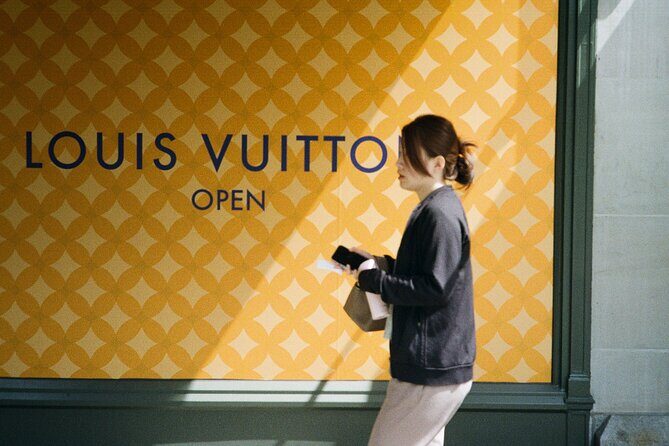
- Shadow composition: Shadows can act like framing lines. Watch how shadows stretch and overlap, then use that to organize the image.
- Reflection hunting: Glass storefronts and mirrored surfaces can give you doubles—subject plus reflection—sometimes in one frame. You’ll learn to look for the angle where the reflection actually contributes instead of just distracting.
- Waiting for small moments: The city moves fast. A good street photo often happens when you’re ready before the moment arrives.
You can also read our reviews of more guided tours in Vancouver


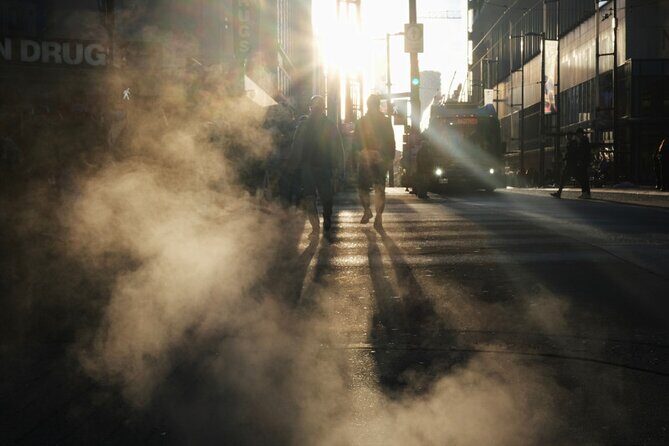
A tip you can use immediately
Once you spot a great lighting situation—strong contrast, a clean shadow shape, or a reflection—don’t rush. Take a few test frames, then wait for the right person to enter. In street photography, the “right” subject is often one tiny beat after the scene looks perfect.
You’ll also be thinking about interactions between strangers. Those can be the emotional center of a photo: two people crossing paths, someone reacting to a sign, a brief exchange that lasts only seconds. This is why a guided walk helps. The route and pacing encourage you to notice those micro-moments instead of treating them as accidents.
Chris and Jake’s Style: How They Tailor the Route to You
This walk is led by local street photography guides Chris and Jake. What stands out is their approach: friendly, patient coaching that still feels practical. A big theme from their guidance is that they don’t treat street photography like a talent contest. They help you produce the best version of what you can do.
One key detail: they ask about your interests first, then adjust the walk accordingly. That’s not a small thing. If you love portraits-by-weather, you’ll want help with how to isolate people. If you prefer reflections and street geometry, you’ll want tips on angles and layering. Asking your interests up front keeps the guidance aligned with your goals.
If you’re not a photographer
You might think street photography tours are only for people who already shoot a lot. But the walk also works as a city exploration for someone who enjoys chatting and discovering neighborhoods through photos. You’ll still be moving, still learning how to see, and you’ll have plenty to talk about even if your partner isn’t focused on the camera.
How to get the most from the coaching
Before you start shooting, take a quick second to tell the guides what you want. For example:
- Are you aiming for silhouettes and graphic shapes, or real expressions?
- Do you want reflections and layers, or candid interactions?
- Are you comfortable with manual camera settings, or are you shooting on your phone?
That kind of honest input helps them steer you toward shots you can actually execute during the walk.
Coffee and a Free Ticket: Where the Value Really Comes From

The experience includes coffee and/or tea. It’s not a throwaway perk. Street photography walks can be mentally intense because you’re scanning constantly—light, shadow, people, reflections, spacing. A warm drink helps you keep going with a clear head instead of rushing through the last 20 minutes.
Also, the admission ticket is free. That matters because the money you spend (whatever your booking price ends up being) is primarily for the guided instruction and time with the guides—not for museum-style entry fees or extra attractions.
Value checklist you can use
Ask yourself what you’re paying for. In this case, you’re paying for:
- a focused 2-hour downtown route
- small-group attention
- guidance aimed at helping you take more interesting shots you can repeat later
That last part is important. One of the best outcomes from guided street photography is that you leave with an eye for what to look for later. Then you can return to a spot on your own and practice again—your own “next day test” can turn into a mini photo workshop.
What to Bring (Since Photo Gear Isn’t Included)
This is a common point that surprises people: photographic equipment is not included. So plan on bringing what you’ll shoot with:
- a camera, or
- a smartphone with a camera app you’re comfortable using
If you’re using a phone, bring it fully charged, and consider a simple strap or pocket habit so you can react quickly without fiddling.
You should also bring basic comfort items, because the walk depends on being outside. The experience requires good weather, so on your booking day, check forecasts and dress for Vancouver conditions. If you run cold easily, layer up. If you’re sensitive to wind off the street, bring a hat or something that blocks it.
Finally, wear shoes that handle city sidewalks. This isn’t a sprint, but you’ll want stable footing while you look for reflections, move around subjects, and adjust your angle.
Who Should Book This Street Photography Walk?
This is a strong fit if you want:
- a structured way to improve street photos in a short time
- hands-on guidance from Chris and Jake
- an urban photo practice that focuses on light and shadow rather than complicated gear tricks
- a small-group experience (max 6) where you can actually ask questions
It’s also a good match for couples or mixed-interest groups. If one person loves photography and another just wants a cool walk and local conversation, the format still works. The guided nature gives the non-photographer an easier way to engage with the city while the photographer has a plan.
You might want to choose another option if:
- you need equipment provided (this one doesn’t include it)
- you hate walking around outdoors in changing city light
- you want a multi-neighborhood tour rather than one focused downtown area
Should You Book the Art of Street Photography Guided Walk?
I’d book it if you’re excited by the craft side of street photography: silhouettes, shadows, reflections, and candid city moments—plus you want guidance that meets you where you are. The best part is the small-group coaching style from Chris and Jake, including tailoring the route to your interests. For a first trip to Vancouver, or a first attempt at street photography, it’s a practical way to get momentum fast.
Skip it if you’re hoping someone hands you gear or if you want a long, sprawling tour. This is focused, outdoor, and dependent on good weather. If that fits your style, you’ll likely leave with images you can learn from and spots you’ll want to try again.
FAQ
How long is the Art of Street Photography Guided Walk?
It runs for about 2 hours.
Where does the tour start?
The meeting point is 725 W Georgia St, Vancouver, BC V7Y, Canada.
Does the tour end at the same place?
Yes. It ends back at the meeting point.
What is included in the tour price?
Coffee and/or tea are included.
Is photographic equipment included?
No. You need to bring your own photographic equipment.
What language is the tour offered in?
The tour is offered in English.
What group size should I expect?
The tour has a maximum of 6 travelers.
What weather conditions are required?
The tour requires good weather. If it’s canceled due to poor weather, you’ll be offered a different date or a full refund.